SysReptor another awesome reporting tool
Just a few weeks before my OSCP exam I saw SysReptor. I then briefly looked at what I could do with it and it looked very promising. Ultimately I chose to put it on my personal research backlog when I have a little more time left. Yesterday I was reminded by sML that I still had this on my backlog. So it’s time to get started with it. After working a few hours with this tool, I think ‘why didn’t I choose to do this for my OSCP exam?’. It looks good and the first tests with creating new projects and demo reports aew very good.
To use SysReptor we need to install it on our system. The standard installation assumes Ubuntu as the operating system. But when hacking in the Offsec environment I use Kali. That’s why I describe here how you can install it on Kali.
Install SysReptor with a bash script
This section of the post has been updated on March 16, 2025, following my successful completion of the OSEP exam and the creation of a script to install SysReptor on the latest version of Kali (2024.4).
In the week leading up to my OSEP exam, I successfully installed SysReptor, but I also implemented some additional steps that were not covered in my previous blog post.
To get started, copy the code below and paste it into a file named install_sysreptor.sh:
1
2
3
4
5
6
7
8
9
10
11
12
13
14
15
16
17
18
19
20
21
22
23
24
25
26
27
28
29
30
31
32
33
34
35
36
37
38
39
40
41
42
43
44
45
46
47
48
49
50
51
52
53
54
55
56
57
58
59
60
61
62
63
64
65
66
67
68
#!/bin/bash

# Exit immediately if a command exits with a non-zero status
set -e

# Set up Docker's apt repository.

# Update the package index
echo "Updating package index..."
sudo apt-get update

# Install required packages including sed, curl, openssl, uuid-runtime, and coreutils
echo "Installing required packages..."
sudo apt-get install -y sed curl openssl uuid-runtime coreutils ca-certificates

# Add Docker's official GPG key
echo "Adding Docker's official GPG key..."
sudo install -m 0755 -d /etc/apt/keyrings
sudo curl -fsSL https://download.docker.com/linux/debian/gpg -o /etc/apt/keyrings/docker.asc
sudo chmod a+r /etc/apt/keyrings/docker.asc

# Add the Docker repository to Apt sources
echo "Adding Docker repository to Apt sources..."
echo \
  "deb [arch=$(dpkg --print-architecture) signed-by=/etc/apt/keyrings/docker.asc] https://download.docker.com/linux/debian \
  bookworm stable" | \
  sudo tee /etc/apt/sources.list.d/docker.list > /dev/null

# Update the package index again
echo "Updating package index again..."
sudo apt-get update

# Install Docker
echo "Installing Docker..."
sudo apt-get install -y docker-ce docker-ce-cli containerd.io docker-compose-plugin

# Start and enable Docker service
echo "Starting and enabling Docker service..."
sudo systemctl start docker
sudo systemctl enable docker

# Verify Docker installation
echo "Verifying Docker installation..."
sudo docker run hello-world

echo "Docker installation completed successfully!"

# Download the install.sh script
echo "Downloading the install.sh script..."
wget https://docs.sysreptor.com/install.sh

# Make the script executable
echo "Making install.sh executable..."
chmod +x install.sh

# Prompt user for confirmation to run the install script
read -p "Do you want to run the install.sh script? (y/n): " choice

if [[ "$choice" == "y" || "$choice" == "Y" ]]; then
    echo "Running install.sh..."
    sudo ./install.sh
else
    echo "You chose not to run the install.sh script from Sysreptor."
    echo "You can run the following commands manually if needed:"
    echo "wget https://docs.sysreptor.com/install.sh"
    echo "chmod +x install.sh"
    echo "sudo ./install.sh"
fi
Once you’ve created the file, it’s essential to grant it executable permissions. You can do this by running the following command:
1
chmod +x install_sysreptor.sh
With the executable rights in place, you can now execute the script with elevated privileges. This will allow the script to update your system and install the necessary software. Simply run:
1
sudo ./install_sysreptor.sh
Import all kind of templates
There are some templates for Offsec and Hack The Box avalable what can be downloaded from sysreptor it self. The Offsec templates are not official, but they are looking awesome. Importing those templates are just a few commands that will make your life easier in the end.
Install the Offsec templates
There are several Offsec templates for within SysReptor. With the exception of a few minor points, these templates are almost identical to those of Offsec. That’s why I also explain how you can install these templates so that you can use them when creating your report.
First you have to change the working directory to the location where Sysreptor have been installed.
1
cd sysreptor/deploy
We then assign the archive with all the templates to a variable that we can then use in another command to install the templates.
1
url="https://docs.sysreptor.com/assets/offsec-designs.tar.gz"
Now we retrieve the archive with templates and immediately install it in SysReptor.
1
curl -s "$url" | sudo docker compose exec --no-TTY app python3 manage.py importdemodata --type=design
Install the Hack The Box Report templates
Hack The Box Reports has three kind of templates. And I think they are looking pretty well. Just like when we had to import the Offsec templates we have to change the working directory so we can install the HTB Report templates.
1
cd sysreptor/deploy
Now we should declare the URL variable to the location of the templates.
1
url="https://docs.sysreptor.com/assets/htb-designs.tar.gz"
And lastly we should import the templates so the HTB Report tempaltes are available in Sysreptor.
1
curl -s "$url" | sudo docker compose exec --no-TTY app python3 manage.py importdemodata --type=design
Logon to SysReptor
After installation the username and password will be shown. And after logging into SysReptor, it is wise to change the password to something that does not come from an installation. Once you have logged in to SysReptor for the first time, it is recommended that you set up MFA (Multi Factor Authentication). It is not mandatory, but it is recommended.
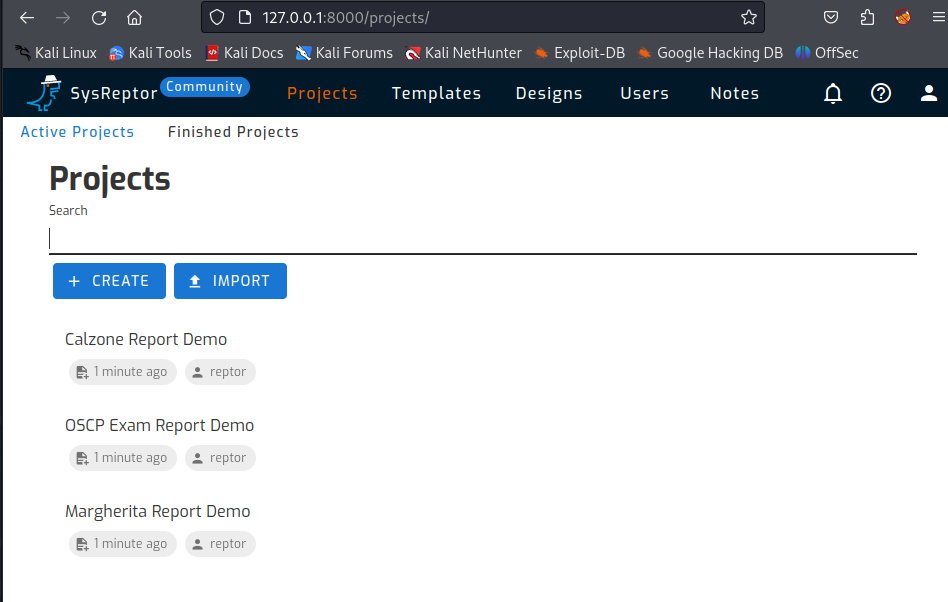
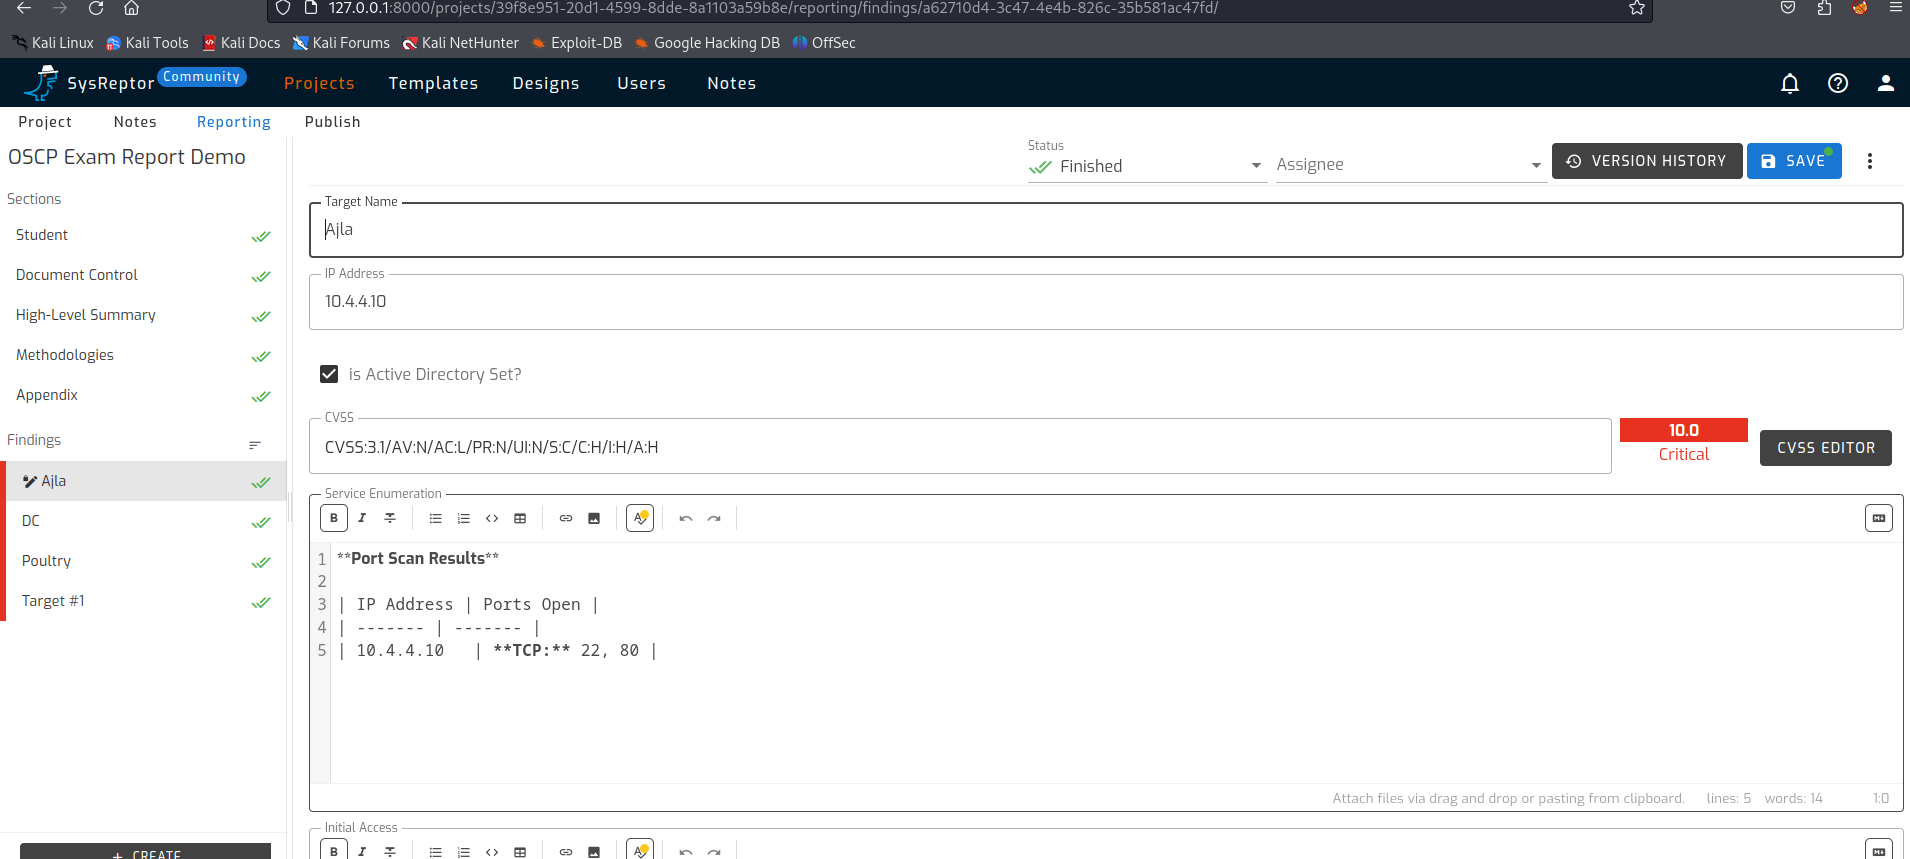
When you go to the projects page you will see that a number of examples are already present in the system by default. One of the examples is an OSCP demo template report.
Open a project (OSCP Exam Report Demo)
When you open the project, a number of sections will be shown on the left side of the page. These sections fill the first chapters in the report. As an example, the ‘Student’ section asks for the student’s name, an OSID identifier and email address. These are used in the report. 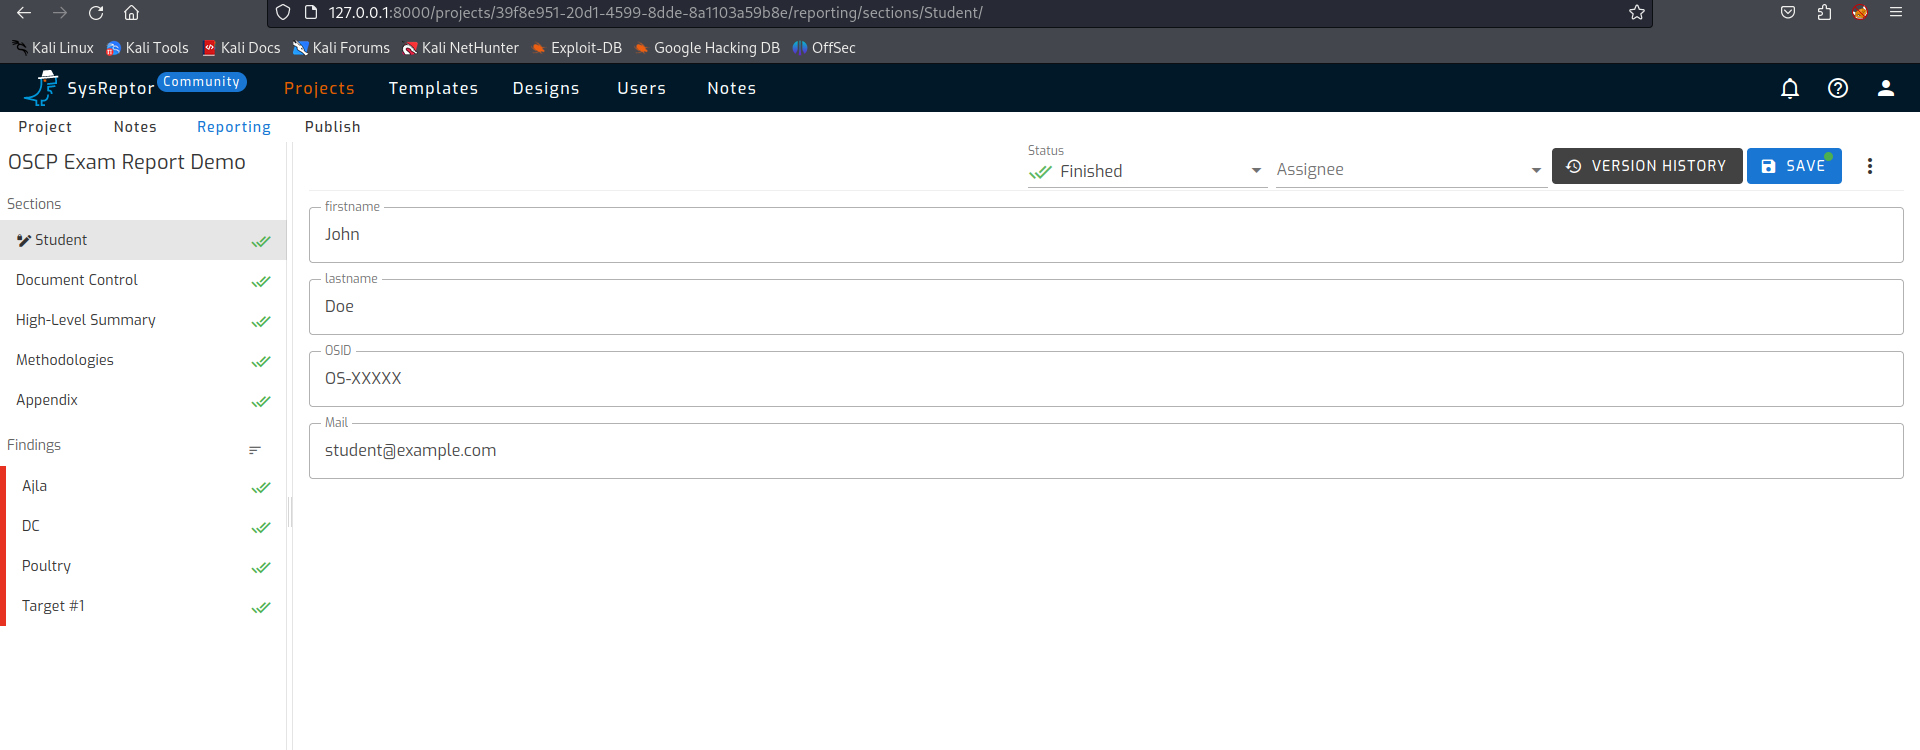
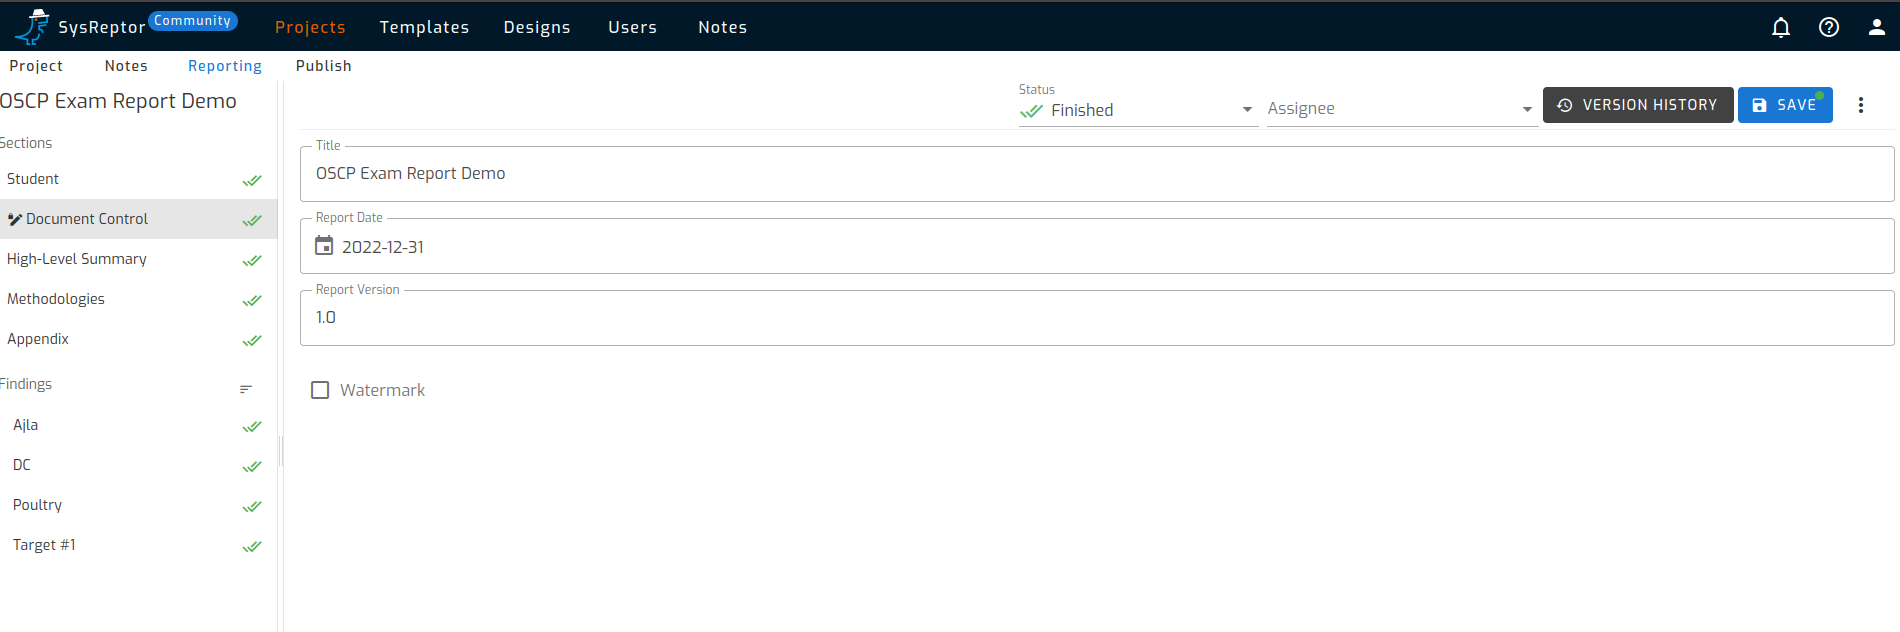
As in any report, a title, date of the report and a version number must be provided. This is also neatly shown in the sections.
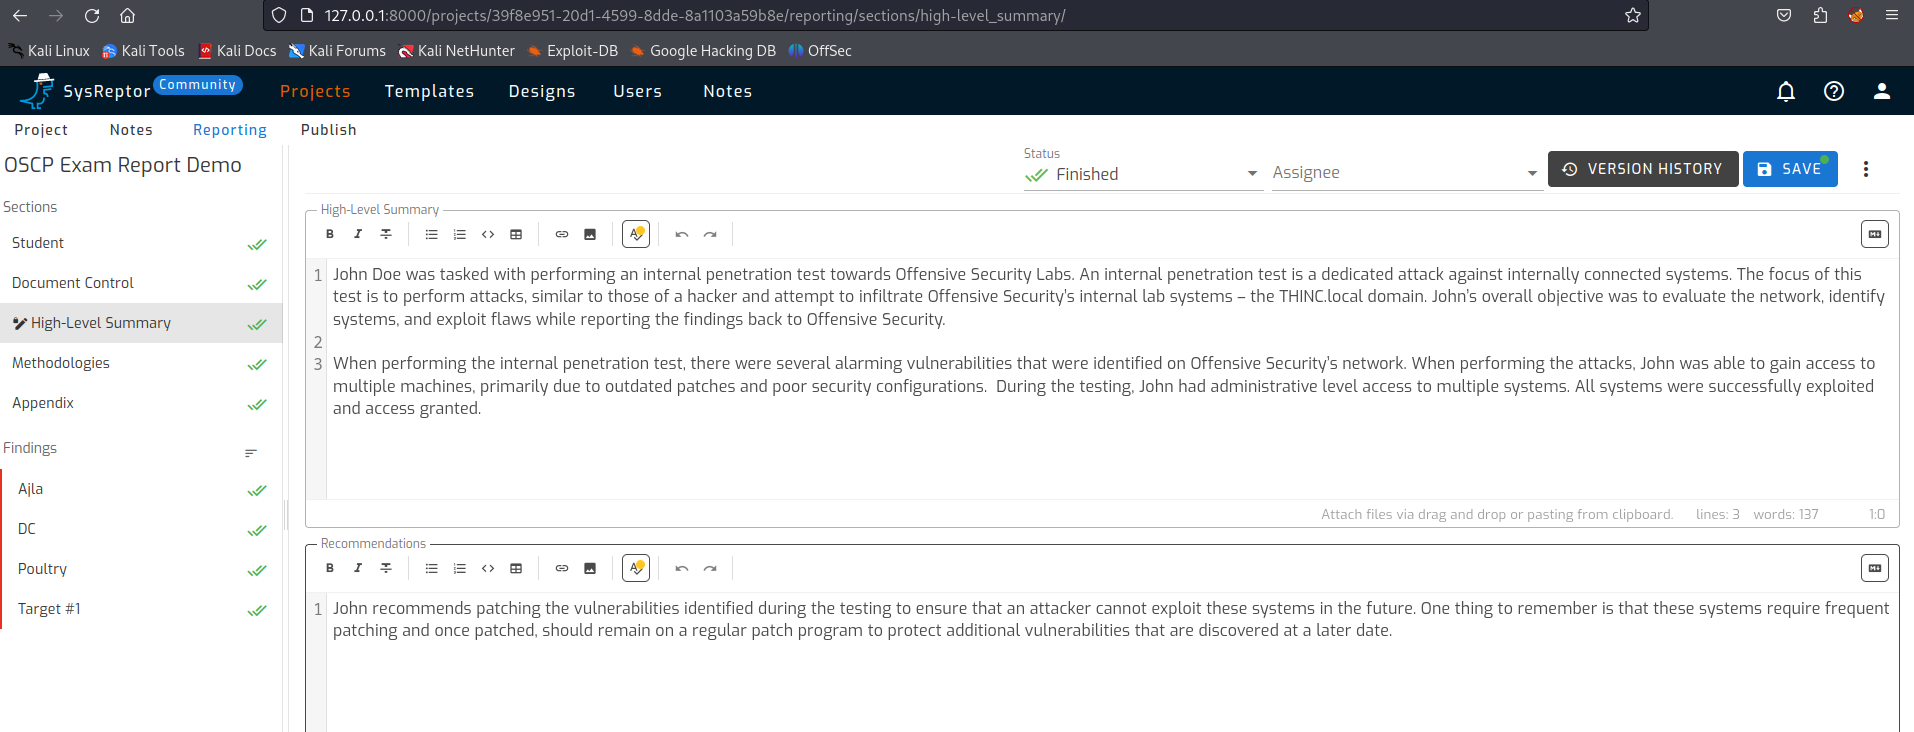
A good report has a high level summary for management. This describes in detail what has been carried out. The fields can be formatted so that it can also be neatly displayed in the report.
The methodologies and steps within this are also covered in the template.

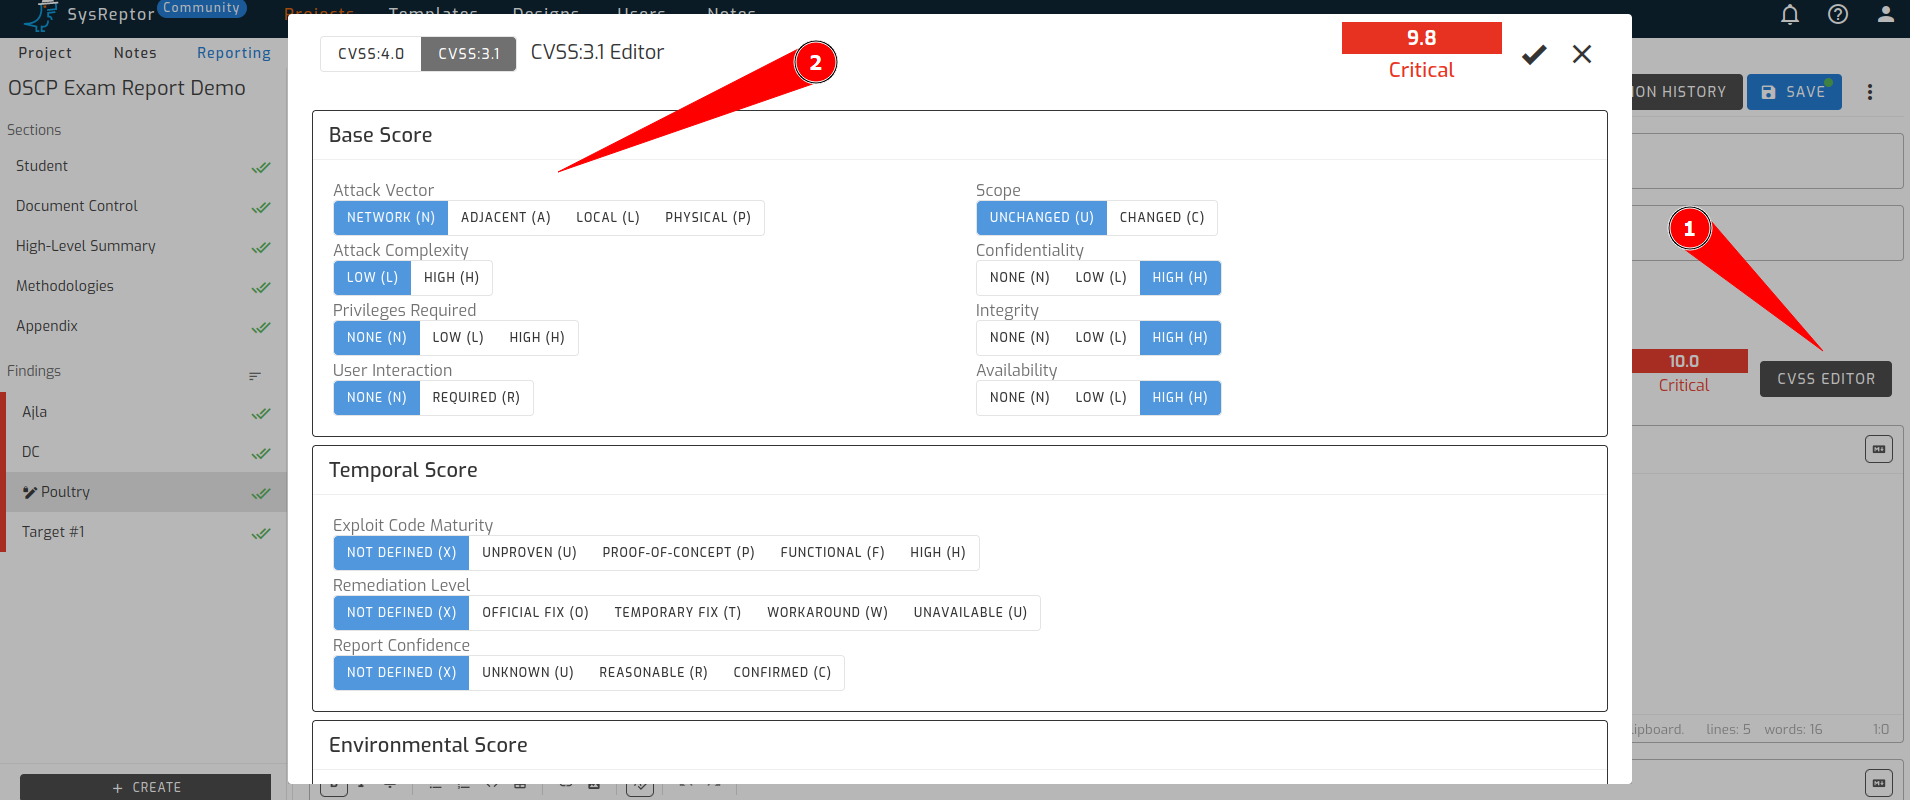
If we look at the findings, we see that MD is used to provide tables and layout. This makes the report clear and readable. One of the things that strikes me is that a CVSS score can also be given. This is missing from the standard template that can be downloaded from Offsec. Something that I believe should be included in a report.
So when you click on the ‘CVSS EDITOR’ button, a small section will open showing the CVSS calculator. This is easy to use. In the calculator they have even included CVSS:4.0, which was recently published.
When creating the report for your exam, you follow a number of steps.
- Create a new project (or open an existing one).
- Complete the report.
- Publish the report.
- Give the report the correct name.
- Download the report.
- Done
In addition, a password can also be placed on the report. This can be disabled if you uncheck the ‘Encrypt report PDF’ checkbox.
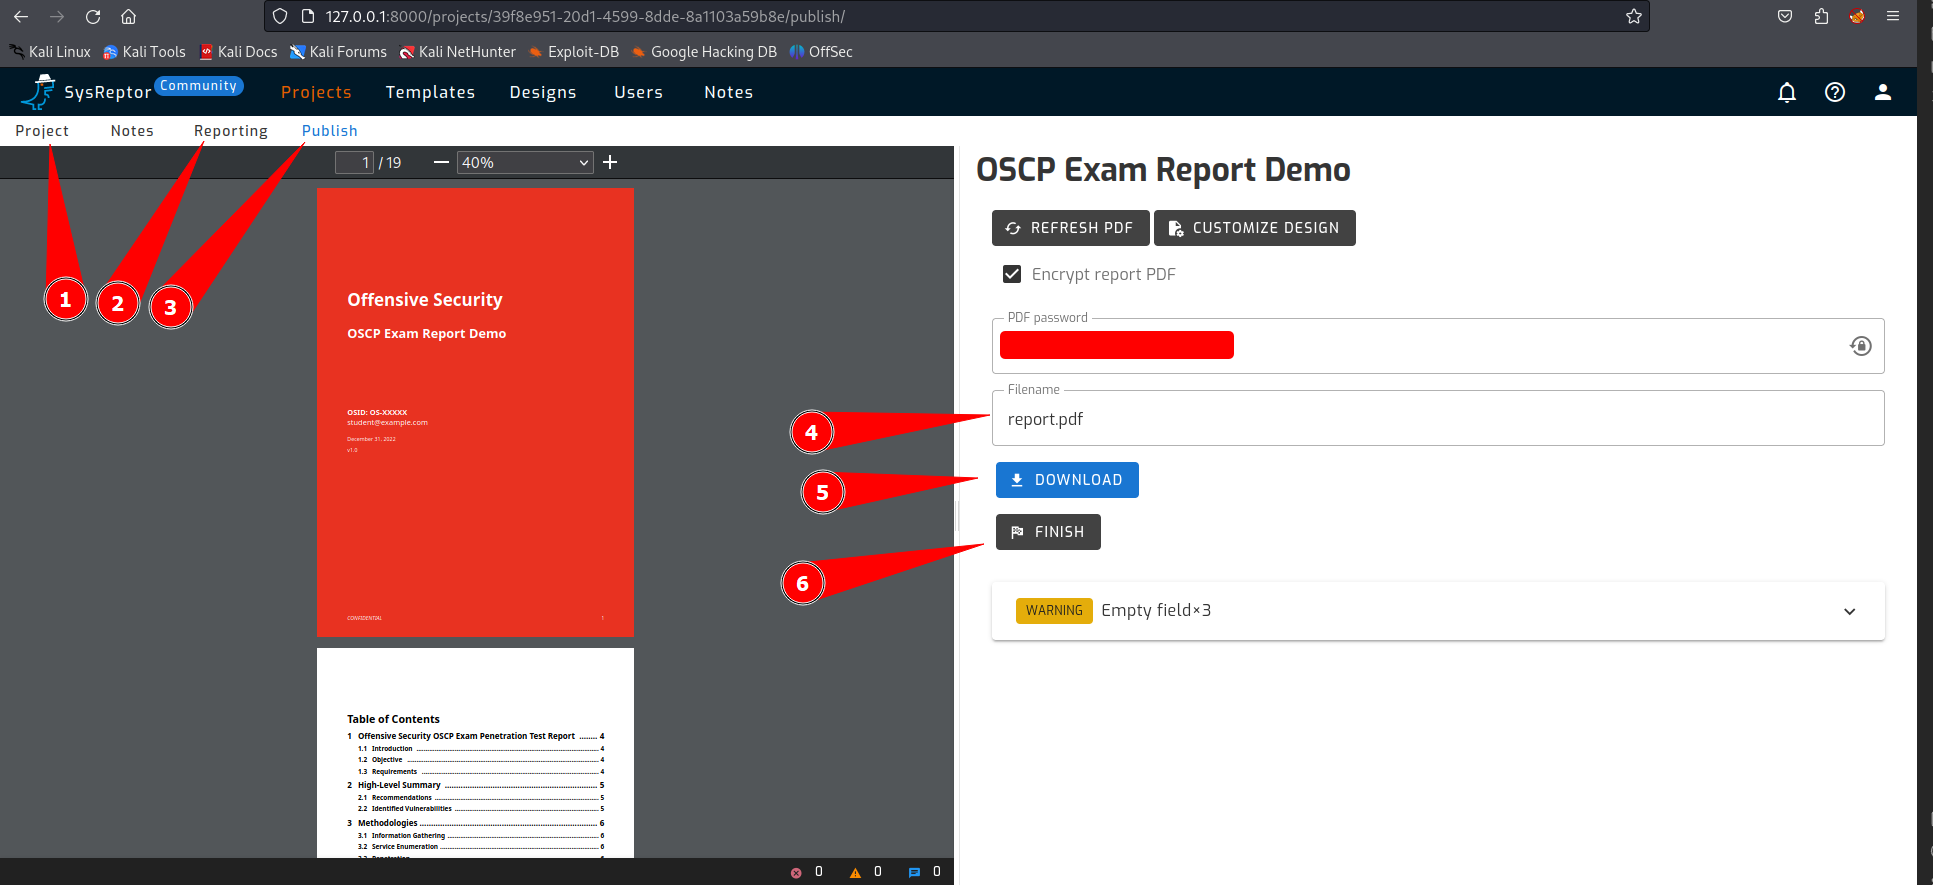
Don’t use a password for your exam report! For other projects it is wise to use a password.
Create a new project
When you want to create a new report, it is useful if a number of templates have already been added to the system. In one of the earlier steps we added a number of templates for Offsec exams. In the next steps I will show you how to start a project.

If you have clicked on a new project, we must fill in some information. First we need to name the project and select a template. Then you could select other users who are allowed to work on the project. By clicking the ‘CREATE’ button an empty report is created.
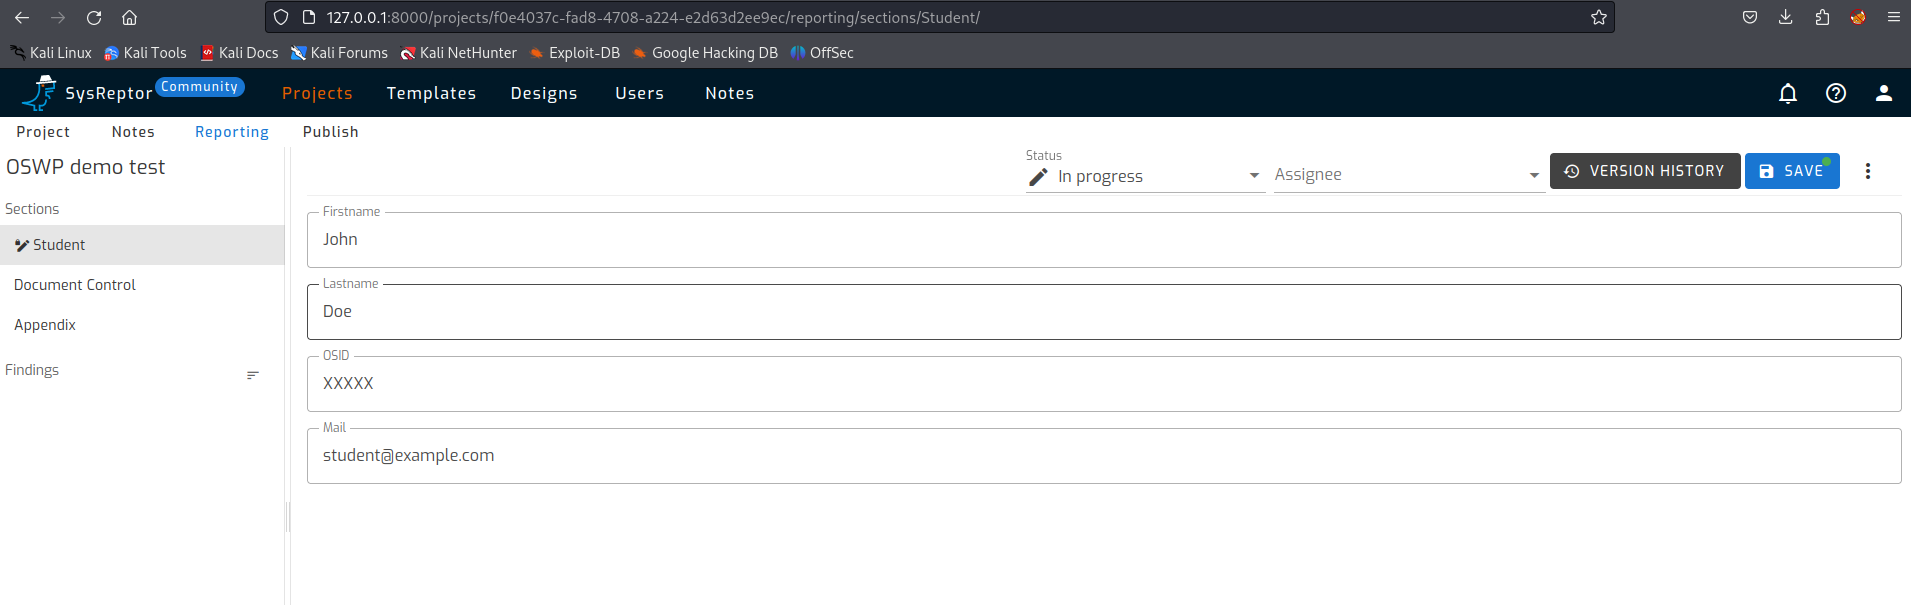
On the left side of the page there are sections shown that will fill the first chapters in the report. The first section is student again. In this section you should fill your name, your OSID identifier and email address. These are used in the report.
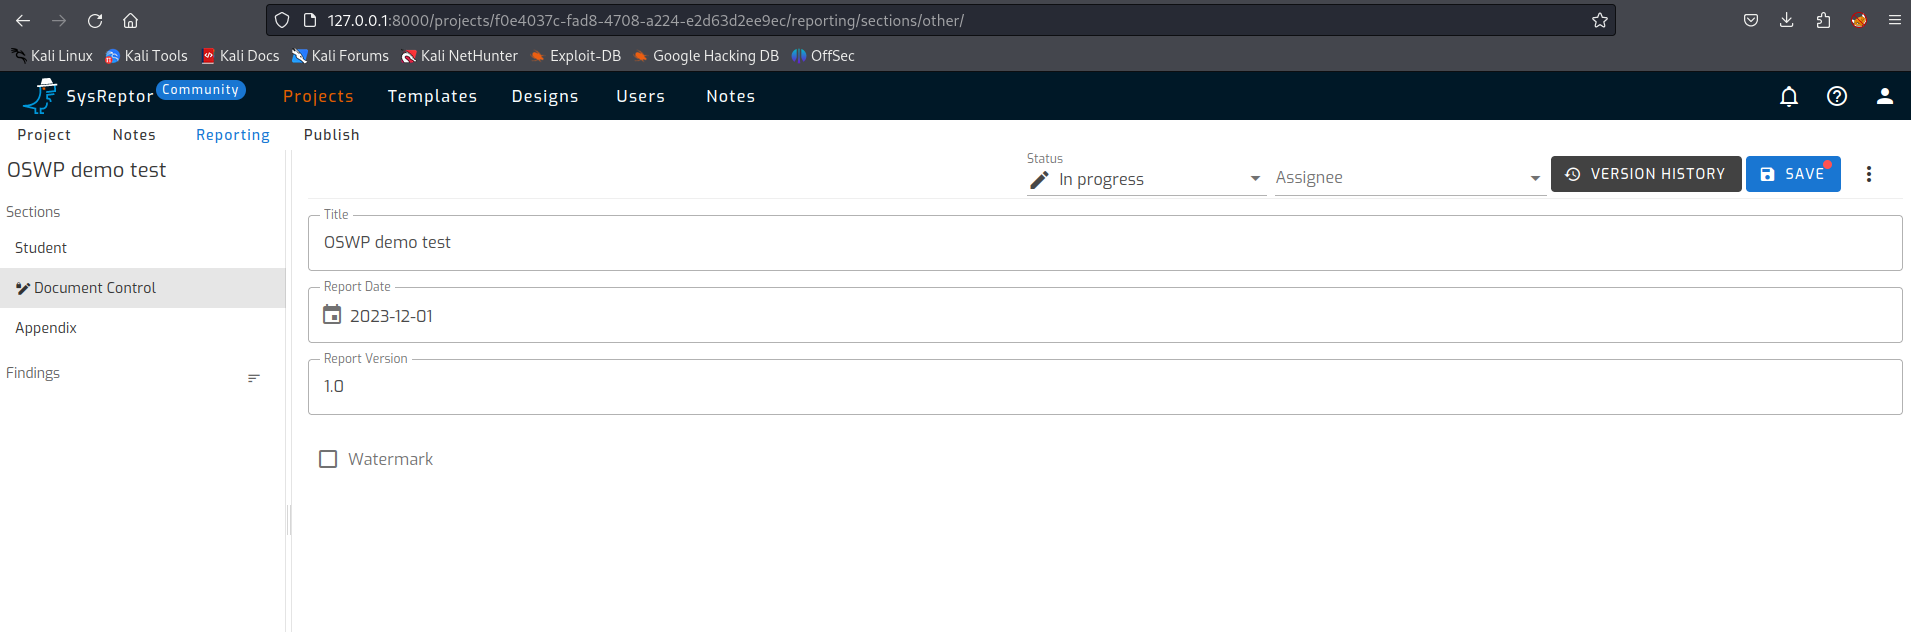
You then have to provide a title, a report date and a version number. Version management is not available in the community edition. This is present in the paid version.
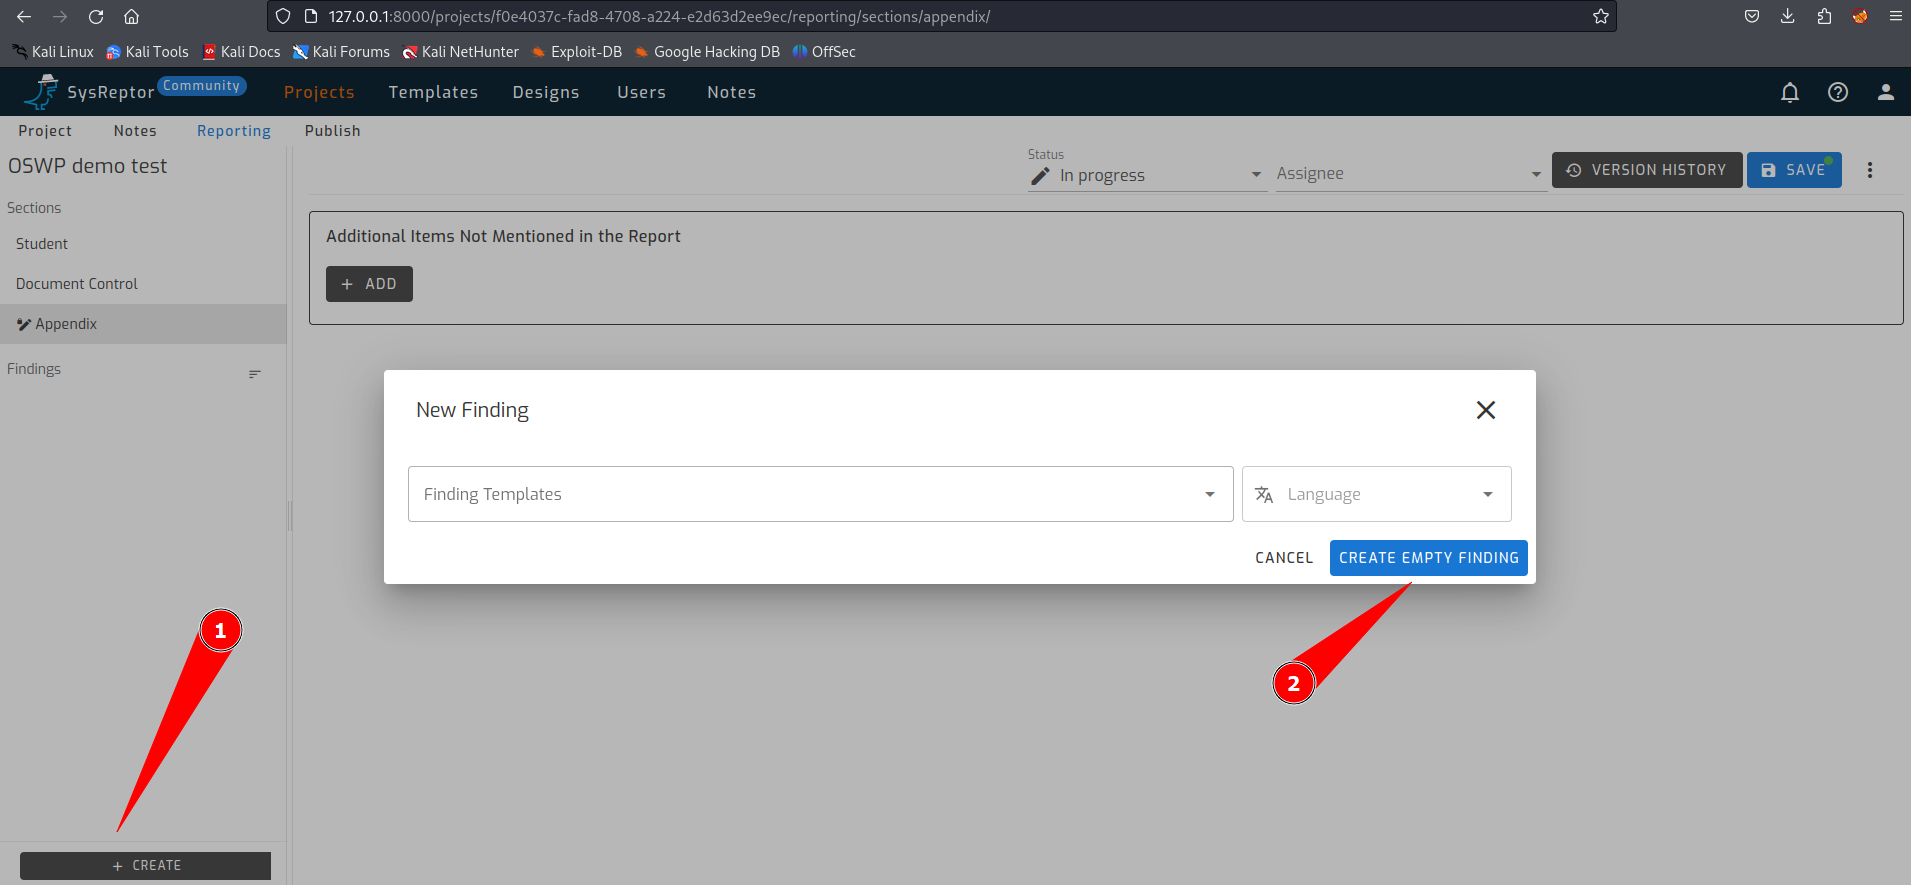
Now a finding can be added to the report. At the bottom left is the + CREATE button to add a finding. If you have a finding template you can select it. In our case we click on ‘CREATE EMPTY FINDING’ after which we can fill in the finding.
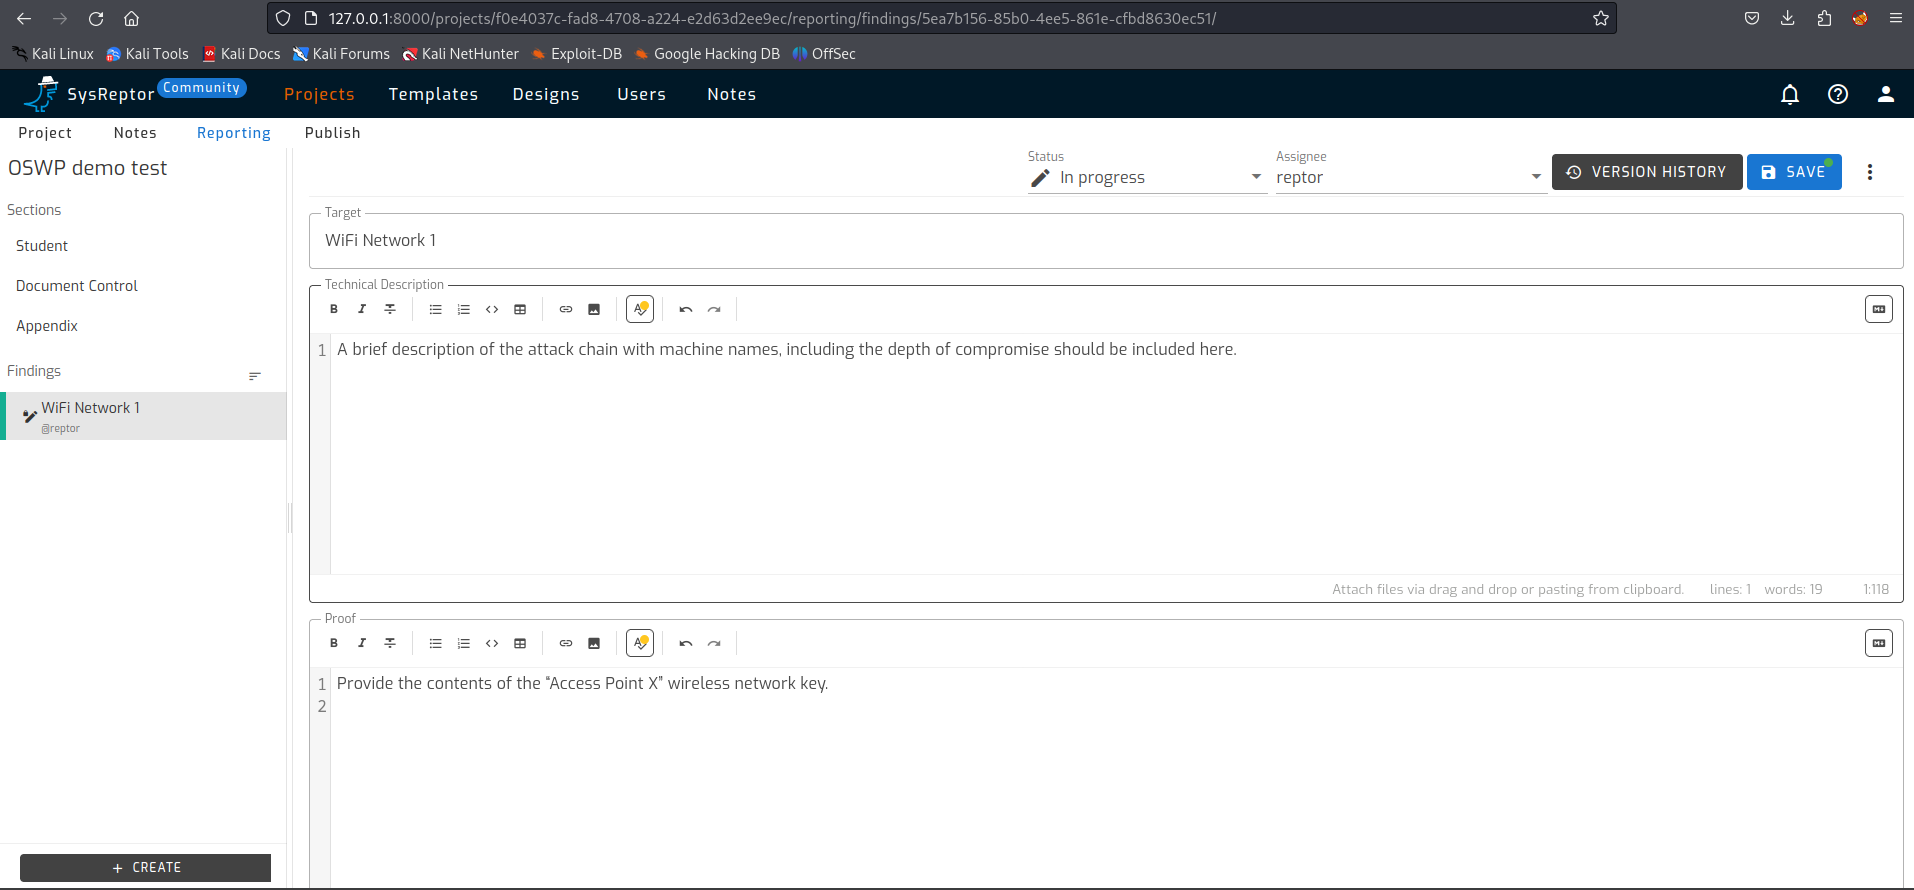
We start by specifying a target, which will be displayed as a title in the Findings. Then it’s basically just filling in the fields. Screenshots can be added. A number of screenshots are mandatory according to Offsec exam requirements, so check carefully where you need to add them.
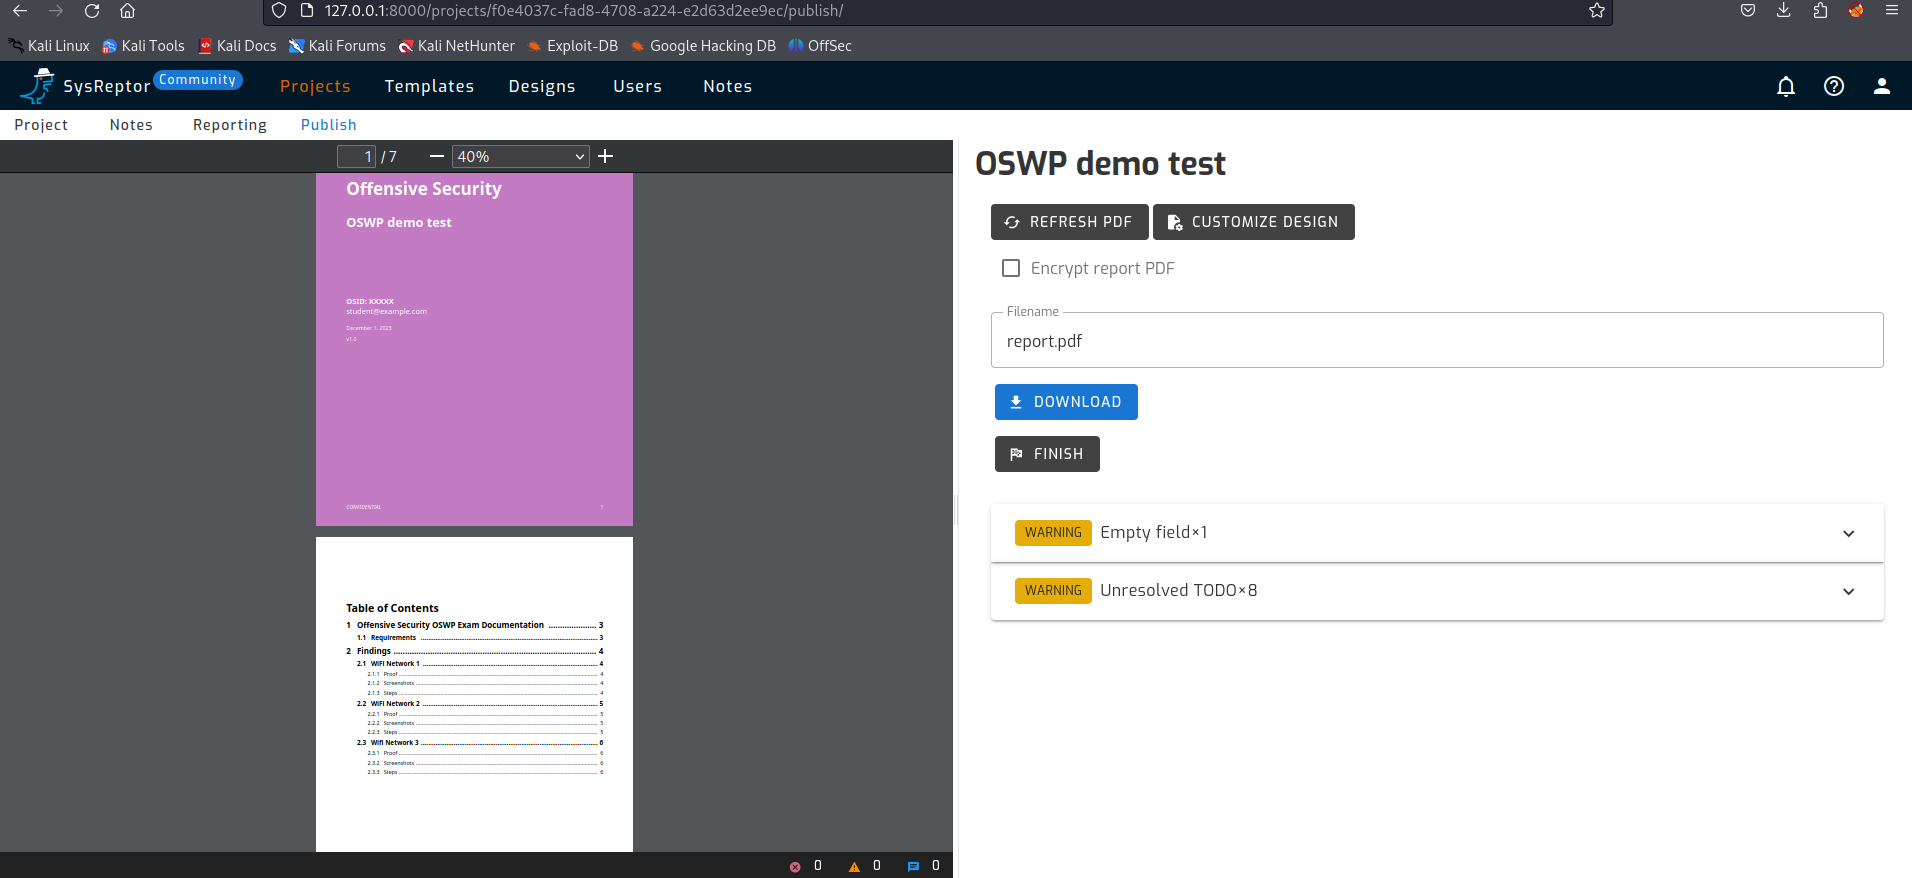
Is your report ready? Then you can publish it as we have done before in the OSCP sample report.
A final word of advice if you are preparing for an Offsec exam and want to use SysReptor to create your report. Practice making the report before you have the exam and NOT during your exam.
Old manual for installation of Sysreptor on Kali
After creating the script for installing SysReptor, I had no idea what to do with the old manually installation blog post. For now, I moved the old instructions to the bottom of the page.
Installing Docker on Kali Linux
We should start with updating the package list.
1
sudo apt update
Next we should install docker.io.
1
sudo apt install -y docker.io
After installation we can enable and start the Docker service on our system.
1
sudo systemctl enable docker --now
##@# Installing docker-ce on Kali Linux We should install some more stuff on our Kali system to install SysReptor. We should add the Docker repository to the system’s package sources, which is necessary for the apt-get update and apt-get install docker-ce commands that follow. This ensures that the system is aware of the Docker repository and can download and install the necessary packages from it.
1
printf '%s\n' "deb https://download.docker.com/linux/debian bullseye stable" | sudo tee /etc/apt/sources.list.d/docker-ce.list
Now we should add the Docker repository’s GPG key to the system’s list of trusted keys. The system can verify the integrity and authenticity of the packages downloaded from the Docker repository. This ensures that the packages are from a trusted source and have not been tampered with.
1
curl -fsSL https://download.docker.com/linux/debian/gpg | sudo gpg --dearmor -o /etc/apt/trusted.gpg.d/docker-ce-archive-keyring.gpg
Before installing the last thing we have to update the package list again.
1
sudo apt update
After updating the package list we can install the last things.
1
sudo apt install -y docker-ce docker-ce-cli containerd.io
##@ Install SysReptor We can install SysReptor automatically with the following command:
1
curl -s https://docs.sysreptor.com/install.sh | sudo bash
Nice and easy, but I can also imagine that you would rather do everything yourself. Then follow this manual. Please note, at the end of the (automatic) installation, a username and password will be shown. Store those credentials some where safe.