A bit of WiFi recon
While preparing for OSWP I stumbled across WiFiChallengeLAB, where you can download a virtual machine with several WiFi networks. To start hacking a WiFi network you should do recon first to gather a bit of information.
Starting WiFi reconnaissance
Information such as SSID, BSSID, which channel is used, whether there are clients connected to a WiFi access point, etc. After all, you cannot hack a WiFi network without information. We can gather this information We may collect this information in various ways. In this post I will describe two that I used to identify a channel.
Identify the channel of an Access Point (Method 1)
Within the terminal you can enter the following command: nmcli dev wifi list
1
2
3
4
5
6
7
8
9
10
11
12
13
14
15
16
17
18
19
root@WiFiChallengeLab:~# nmcli dev wifi list

IN-USE  BSSID              SSID                   MODE   CHAN  RATE       SIGNAL  BARS  SECURITY
        F0:9F:C2:AA:19:29  wifi-old               Infra  XX    54 Mbit/s  100     ▂▄▆█  WEP
        32:6D:7D:8C:19:28  MOVISTAR_JYG2          Infra  XX    54 Mbit/s  100     ▂▄▆█  WPA2
        B6:1A:C6:A9:F3:8E  MiFibra-5-D6G3         Infra  XX    54 Mbit/s  100     ▂▄▆█  WPA2
        32:AE:D9:AF:96:61  WIFI-JUAN              Infra  XX    54 Mbit/s  100     ▂▄▆█  WPA2
        F0:9F:C2:71:22:12  wifi-mobile            Infra  XX    54 Mbit/s  100     ▂▄▆█  WPA2
        F0:9F:C2:71:22:10  wifi-guest             Infra  XX    54 Mbit/s  100     ▂▄▆█  --
        EE:71:32:34:70:C8  vodafone7123           Infra  XX    54 Mbit/s  100     ▂▄▆█  WPA2
        F0:9F:C2:11:0A:24  wifi-management        Infra  XX    54 Mbit/s  100     ▂▄▆█  WPA3
        F0:9F:C2:1A:CA:25  wifi-IT                Infra  XX    54 Mbit/s  100     ▂▄▆█  WPA2 WPA3
        F0:9F:C2:6A:88:26  --                     Infra  XX    54 Mbit/s  100     ▂▄▆█  --
        F0:9F:C2:71:22:1A  wifi-corp              Infra  XX    54 Mbit/s  100     ▂▄▆█  WPA2 802.1X
        F0:9F:C2:71:22:16  wifi-regional          Infra  XX    54 Mbit/s  100     ▂▄▆█  WPA2 802.1X
        F0:9F:C2:7A:33:28  wifi-regional-tablets  Infra  XX    54 Mbit/s  100     ▂▄▆█  WPA2 802.1X
        F0:9F:C2:71:22:17  wifi-global            Infra  XX    54 Mbit/s  100     ▂▄▆█  WPA2 802.1X
        F0:9F:C2:71:22:15  wifi-corp              Infra  XX    54 Mbit/s  100     ▂▄▆█  WPA2 802.1X
It will show all information needed. I think a big advantage is that the security column indicates which security is being used. The highest and lowest are shown here, as with the WiFi-IT network (WPA2 WPA3). We could carry out a downgrade attack on this network. This will be discussed in another post.
Identify the channel of an Access Point (Method 2)
A second way to successfully obtain information can be achieved with airodump. Below I describe the steps that need to be taken.
First, we need to stop some unnecessary processes.
1
2
3
4
5
6
7
8
root@WiFiChallengeLab:~# sudo airmon-ng check kill

Killing these processes:

    PID Name
    573 wpa_supplicant
   1012 ifplugd
After this we can put the network interface in monitor mode.
1
2
3
4
5
6
7
8
9
10
11
12
13
14
15
16
root@WiFiChallengeLab:~# sudo airmon-ng start wlan0

PHY	Interface	Driver		Chipset

phy0	wlan0		mac80211_hwsim	Software simulator of 802.11 radio(s) for mac80211

		(mac80211 monitor mode vif enabled for [phy0]wlan0 on [phy0]wlan0mon)
		(mac80211 station mode vif disabled for [phy0]wlan0)
phy1	wlan1		mac80211_hwsim	Software simulator of 802.11 radio(s) for mac80211
phy2	wlan2		mac80211_hwsim	Software simulator of 802.11 radio(s) for mac80211
phy3	wlan3		mac80211_hwsim	Software simulator of 802.11 radio(s) for mac80211
phy4	wlan4		mac80211_hwsim	Software simulator of 802.11 radio(s) for mac80211
phy5	wlan5		mac80211_hwsim	Software simulator of 802.11 radio(s) for mac80211
phy6	wlan6		mac80211_hwsim	Software simulator of 802.11 radio(s) for mac80211
phy60	wlan60		mac80211_hwsim	Software simulator of 802.11 radio(s) for mac80211
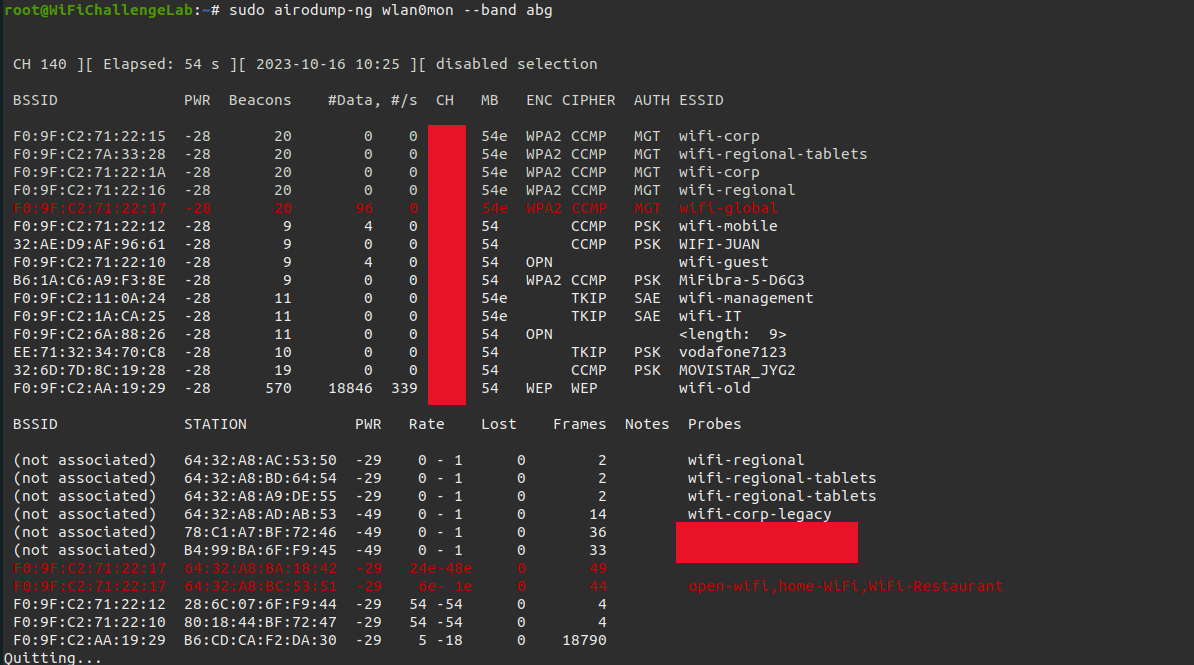
Once the network interface is in monitor mode we can start airodump-ng to collect information.
1
sudo airodump-ng wlan0mon --band abg
Identify the MAC address of a client
A MAC address of a client can be useful if, for example, we need to perform a deauthenticate attack to capture a WPA handshake. During the reconnaissance we must therefore make notes of the MAC addresses that connect to our target (Access Point). WiFiChallensLAB has this as part of the challenges to identify a MAC address.
We’re starting to kill unnecessary processes again.
1
user@WiFiChallengeLab:~$ sudo airmon-ng check kill
After this we can activate the monitor mode for our network interface.
1
user@WiFiChallengeLab:~$ sudo airmon-ng start wlan0
We then need to identify the WiFi networks in the area again.
1
user@WiFiChallengeLab:~$ sudo airodump-ng wlan0mon --band abg
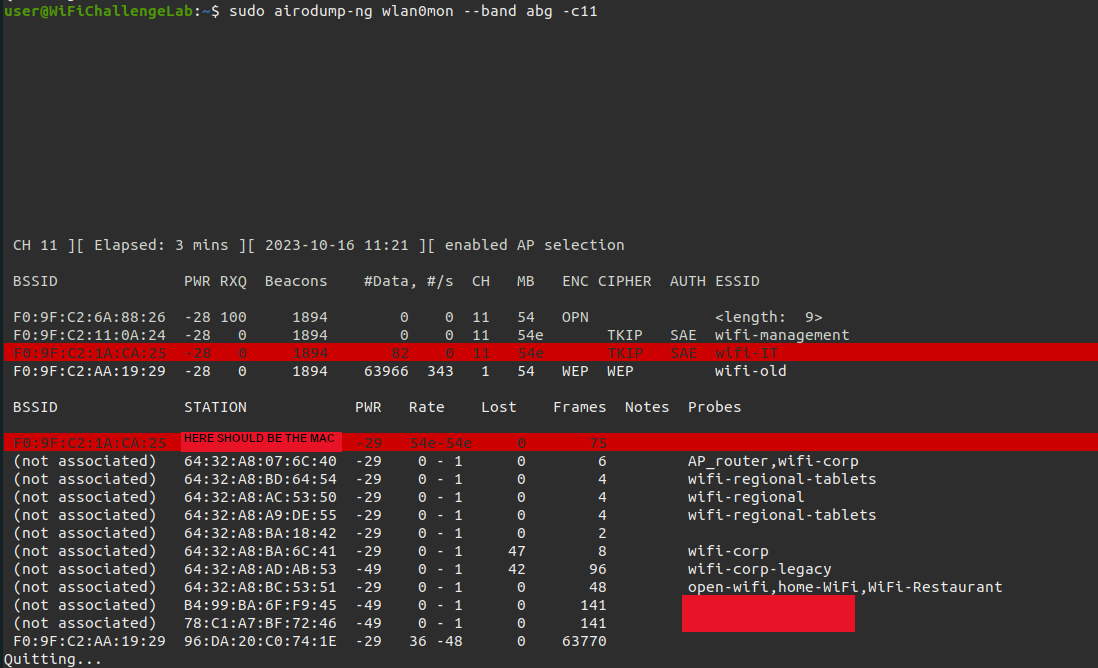
Because there are multiple WiFi networks, we can also specifically monitor a certain channel. This significantly reduces the number of WiFi networks in our overview.
1
user@WiFiChallengeLab:~$ sudo airodump-ng wlan0mon --band abg -c11
A client’s MAC address is displayed at the bottom of the screen. The MAC addresses found that communicate with our target (Access Point) must be added to our notes.
What is the probe of a client?
Devices with a WiFi network interface transmit probe requests to receive information about nearby WiFi networks and establish a WiFi connection. When an access point receives a probe request it will reply with a probe response to establish a connection. An attacker can look for a probes and try to create a rogue access point with that WiFi network name. One fo the recon challenges in WiFiChallengeLABs is to identify the probe requests. To identify the probes we can use the steps below.
First we have to kill some processes.
1
user@WiFiChallengeLab:~$ sudo airmon-ng check kill
Next we have to set the monitor mode on to the network interface.
1
user@WiFiChallengeLab:~$ sudo airmon-ng start wlan0
Now we should check nearby WiFi networks.
1
user@WiFiChallengeLab:~$ sudo airodump-ng wlan0mon --band abg
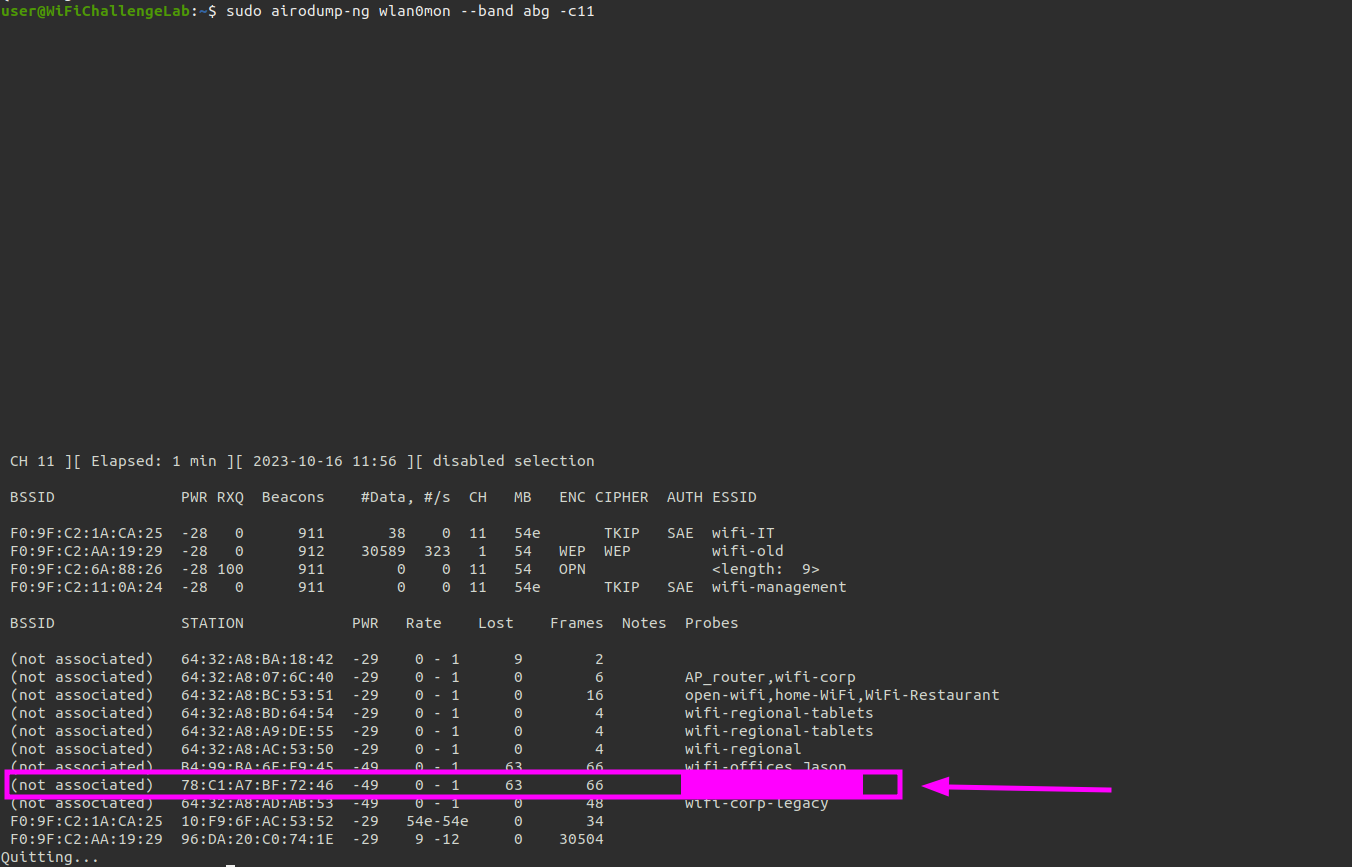
We can monitor on a specific channel as well. In this example we only monitor channel 11.
1
user@WiFiChallengeLab:~$ sudo airodump-ng wlan0mon --band abg -c11
The probes are shown at the bottom next to the workstations.
What is the ESSID of the hidden AP?
A hidden WiFi network is not really hidden. It takes an attacker a little more time to penetrate. In WiFiChallangeLabs there is a challenge where we have to find (and ultimately actually hack) a hidden WiFi network.
Because all networks start with a prefix of wifi-, we first create a new rockyou dictionary.
1
root@WiFiChallengeLab:~# cat ~/rockyou-top100000.txt | awk '{print "wifi-" $1}' > ~/wifi-rockyou.txt
We then kill unnecessary processes before putting the network interface in monitor mode.
1
user@WiFiChallengeLab:~$ sudo airmon-ng check kill
Once the processes have been killed we can put the network interface in monitor mode.
1
user@WiFiChallengeLab:~$ sudo airmon-ng start wlan0
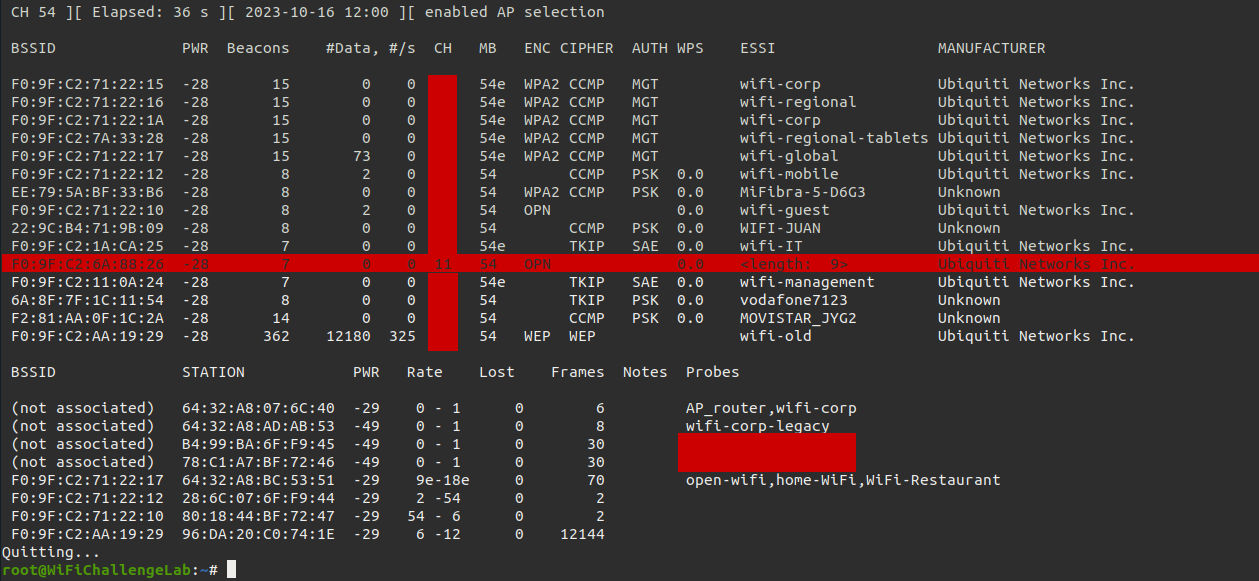
Now we need to collect information about the hidden WiFi network. We have to know the MAC address of the hidden WiFi Access Point.
1
user@WiFiChallengeLab:~$ sudo airodump-ng wlan0mon --band abg
When we have the information required we should try to crack the hidden network name.
1
root@WiFiChallengeLab:~# mdk4 wlan0mon p -t F0:9F:C2:6A:88:26 -f wifi-rockyou.txt
Once we have the SSID name we can add it to our notes and use it to attack the network.


